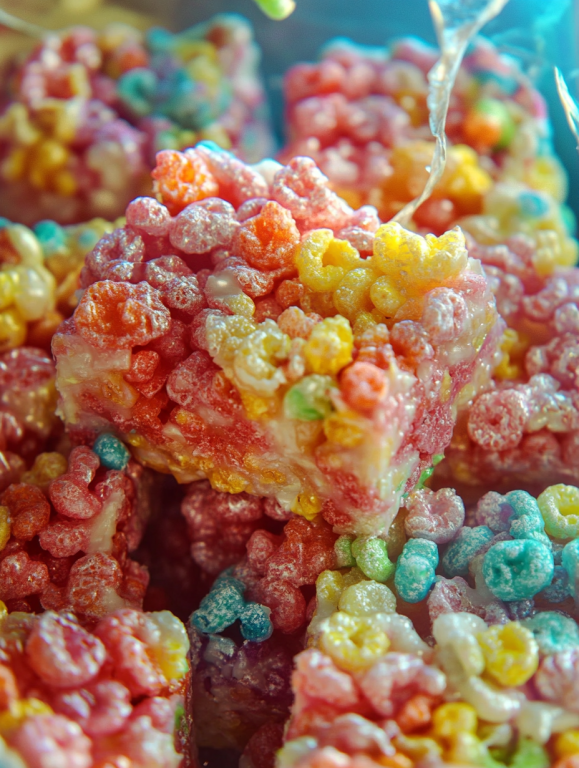
Who doesn’t love a sweet treat that combines nostalgia with a bit of fun? Fruity Pebbles Rice Krispie Treats are the perfect solution for a busy day when you want something quick, easy, and undeniably delicious. These vibrant bars not only satisfy your cravings with their sweet, chewy texture but also bring a smile to anyone who takes a bite. They’re ideal for everything from after-school snacks to festive gatherings!
Why You’ll Love This Recipe
If you’re like me, you often find yourself in a rush, juggling work, family, and life’s unexpected surprises. Well, these Fruity Pebbles Rice Krispie Treats come together in no time! Just a handful of ingredients and a few simple steps will have you whipping up a batch in under 30 minutes. Plus, who can resist those colorful, crunchy flakes? They’re like a party in your mouth!
Ingredients
Alright, let’s gather our superstar ingredients:
- 3 tbsp Butter, melted
- 1 (10 oz) bag Marshmallows (mini or regular – your choice!)
- 6 cups Fruity Pebbles Cereal
That’s it! Seriously, three ingredients to create a whimsical treat. You probably have all of these sitting in your pantry right now. If only every recipe were this easy!
Steps to Deliciousness
- Prep Your Pan: Start by spraying a 9 x 13 pan with some non-stick spray. Trust me; this will save you a mess later!
- Melt the Butter: In a large microwave-safe bowl, melt the butter. Just pop it in the microwave for about 30 seconds, and voilà! Your buttery base is ready.
- Add the Marshmallows: Toss in the marshmallows and give them a good stir to coat them in that golden goodness.
- Microwave Magic: Microwave the marshmallow mixture for 45 seconds. Take it out and stir. Then repeat the process for another 45 seconds. The marshmallows should be all gooey and melted!
- Combine with Fruity Pebbles: Time to add the star of the show! Pour in the Fruity Pebbles and mix everything until the cereal is coated in delicious marshmallow fluff. Use a little elbow grease here; you want it well combined.
- Spread and Press: Transfer the mixture into your prepared pan, spread it evenly, and press down firmly. Let’s get those corners nice and tight!
- Cool and Slice: Allow the treats to cool. Once they’re set (maybe 30 minutes), cut them into squares and enjoy!
Cooking Tips
- If the mixture feels too sticky while pressing it into the pan, dampening your hands with a little water can help.
- Feel free to customize! Add mini chocolate chips or sprinkles for an extra pop of fun.
- Don’t worry if your treats are a bit unevenly cut; they’ll still taste incredible!
A Sweet Memory
When I first made these treats with my sister Patricia, our kitchen turned into a colorful whirlwind of marshmallow fluff and giggles. Watching her eyes light up as she took the first bite was priceless—it’s those little moments that inspire me to keep baking and creating. And honestly, it became my go-to after-school treat because my kids can’t ever seem to get enough of them!
FAQs
Can I substitute ingredients in this recipe?
Absolutely! You can use any type of rice cereal if you can’t find Fruity Pebbles. A more classic combo is Rice Krispies for a vintage feel.
How can I store leftovers?
These treats can be stored in an airtight container at room temperature for up to a week. Just make sure they don’t get too squished!
Can I make these ahead of time?
Yes! You can prepare them a day or two in advance. Just make sure to keep them covered so they stay soft and fresh.
Aren’t these Fruity Pebbles Rice Krispie Treats the perfect blend of simplicity and fun? Your family will love them, and you’ll appreciate how easy they are to make. So grab that apron, rally the kids, and let’s get cooking!
Feel free to explore more delightful recipes on my site like Coffee Cheesecake and embark on your next culinary adventure!
Print
Fruity Pebbles Rice Krispie Treats
Description
Who doesn’t love a sweet treat that combines nostalgia with a bit of fun? Fruity Pebbles Rice Krispie Treats are the perfect solution for a busy day when you want something quick, easy, and undeniably delicious. These vibrant bars not only satisfy your cravings with their sweet, chewy texture but also bring a smile to anyone who takes a bite. They’re ideal for everything from after-school snacks to festive gatherings!
Ingredients
- 3 tbsp Butter, melted
- 1 (10 oz) bag Marshmallows (mini or regular – your choice!)
- 6 cups Fruity Pebbles Cereal
Instructions
- Prep Your Pan: Start by spraying a 9 x 13 pan with some non-stick spray. Trust me; this will save you a mess later!
- Melt the Butter: In a large microwave-safe bowl, melt the butter. Just pop it in the microwave for about 30 seconds, and voilà! Your buttery base is ready.
- Add the Marshmallows: Toss in the marshmallows and give them a good stir to coat them in that golden goodness.
- Microwave Magic: Microwave the marshmallow mixture for 45 seconds. Take it out and stir. Then repeat the process for another 45 seconds. The marshmallows should be all gooey and melted!
- Combine with Fruity Pebbles: Time to add the star of the show! Pour in the Fruity Pebbles and mix everything until the cereal is coated in delicious marshmallow fluff. Use a little elbow grease here; you want it well combined.
- Spread and Press: Transfer the mixture into your prepared pan, spread it evenly, and press down firmly. Let’s get those corners nice and tight!
- Cool and Slice: Allow the treats to cool. Once they’re set (maybe 30 minutes), cut them into squares and enjoy!
Notes
- If the mixture feels too sticky while pressing it into the pan, dampening your hands with a little water can help.
- Feel free to customize! Add mini chocolate chips or sprinkles for an extra pop of fun.
- Don’t worry if your treats are a bit unevenly cut; they’ll still taste incredible!
