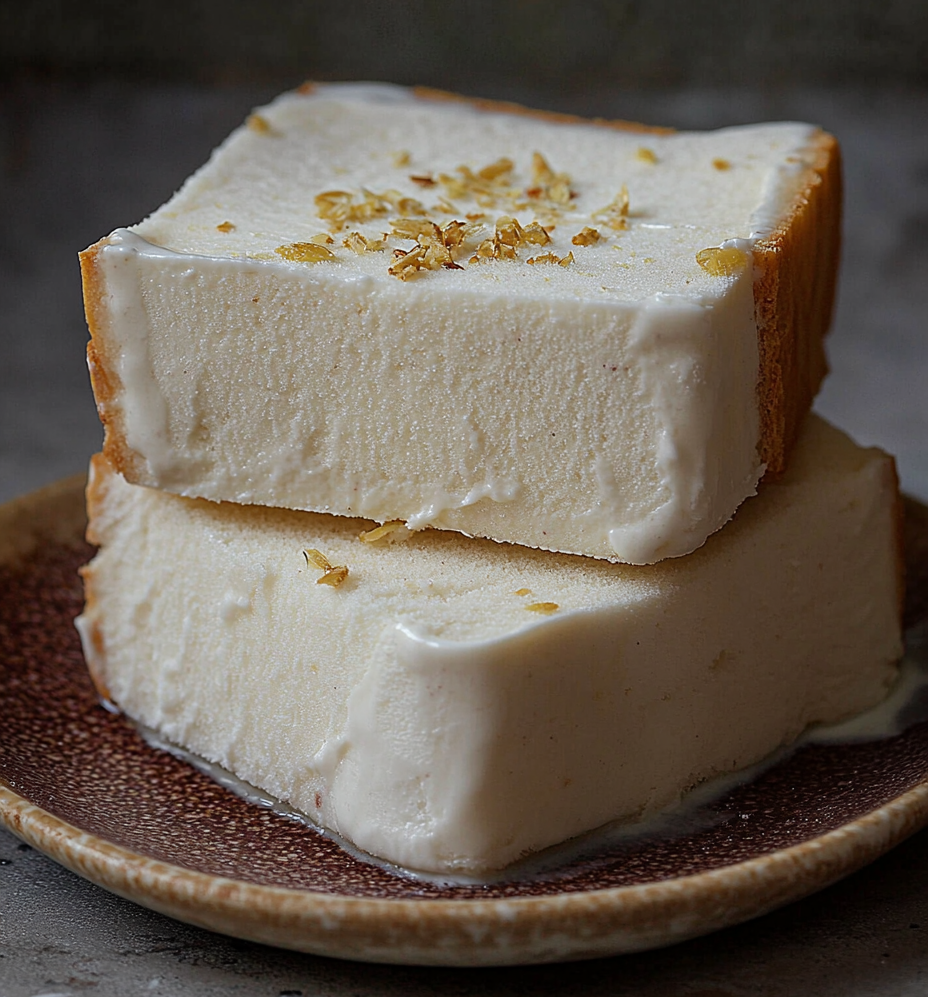
Hey there, dessert lovers! If you’ve ever found yourself staring into the freezer, wishing for something new and exciting to tempt your taste buds, allow me to introduce you to your next obsession: Creamy Bread Ice Cream! 🍞🍦 This delightful treat is not just easy to whip up—it’s also a fantastic way to transform simple ingredients into something creamy, dreamy, and utterly satisfying.
Why You’ll Love This Creamy Bread Ice Cream
This dessert is the perfect blend of nostalgia and creativity. Made with just a handful of ingredients like crustless bread, heavy cream, and a touch of vanilla, it’s an innovative twist on classic ice cream that’ll have everyone asking for seconds. Plus, it’s easy to make, which is essential for us busy women juggling work, family, and everything in between. Trust me, this recipe will make you look like a culinary genius without the fuss!
Ingredients
To create this luscious ice cream, you’ll need:
- 2 cups of bread, crusts removed and cut into cubes
- 2 cups of heavy cream
- 1 cup of whole milk
- 3/4 cup of sugar
- 1 teaspoon of vanilla extract
- A pinch of salt
Steps to Sweet Success
1. Blend It All Up
Let’s get started! Grab your blender and toss in those delightful bread cubes. Add the heavy cream, whole milk, sugar, vanilla extract, and a sprinkle of salt. Blend everything together until the mixture is super smooth and creamy. It’s like a little magic moment in your kitchen!
2. Chill, Baby, Chill
Pour the blended mixture into a bowl, cover it with plastic wrap, and pop it into the fridge for at least 2 hours. This magic step helps the flavors develop and gives your ice cream that smooth texture we all crave.
3. Churn It Up!
After your mixture has chilled, take it out and pour it into your ice cream maker. Follow the manufacturer’s instructions to churn it until it reaches that perfect creamy consistency. Honestly, the sound of the churning is music to my ears—it’s like a sweet symphony of dessert coming together! 🎶
4. Freeze for Perfection
Transfer your ice cream to an airtight container and freeze it for at least 4 hours. I know, I know—waiting is the hardest part, but trust me, it’s worth it!
Cooking Tips
- Old Bread? No Problem! Got some bread lying around that’s a bit stale? Perfect! Stale bread works wonders in this recipe, lending flavor and texture without any waste.
- Flavor Variations: Feeling adventurous? You can stir in some chocolate chips, nuts, or even a swirl of caramel before the freezing step!
- Don’t Panic! If your mixture looks a bit lumpy post-blending, that’s totally normal. It’s all part of the charm of homemade ice cream!
A Personal Touch
I remember the first time I made this Soft Creamy Bread Ice Cream—it was a hit at our family BBQ! When my kids tasted it, their eyes lit up like it was a birthday party! It quickly became our go-to summer treat, and I love knowing I’m serving something homemade, loved, and filled with happy memories.
FAQs
Can I substitute whole milk in this recipe?
Absolutely! You can use almond milk or even coconut milk for a dairy-free version—just keep in mind that this may alter the flavor slightly.
How can I store leftovers?
Once it’s frozen, keep your ice cream in an airtight container to avoid freezer burn. It can last for up to two weeks (if it lasts that long!).
Enjoy Your Creation!
Now that you’ve mastered the art of Creamy Bread Ice Cream, you’ve got a delightful secret weapon for impressing guests or treating yourself after a long day. This recipe is not just about satiating your sweet tooth; it’s a way to create delicious memories in your kitchen!
Get ready to scoop, share, and savor every creamy, dreamy bite of this innovative ice cream. 🍦✨
If you love this recipe, check out my other sweet creations on the blog, like my classic Chocolate Chip Cookies or the irresistible Homemade Brownies. Join me in the kitchen as we create more unforgettable flavors together!
Print
Creamy Bread Ice Cream: A Dreamy Dessert Delight!
Description
Hey there, dessert lovers! If you’ve ever found yourself staring into the freezer, wishing for something new and exciting to tempt your taste buds, allow me to introduce you to your next obsession: Creamy Bread Ice Cream! 🍞🍦 This delightful treat is not just easy to whip up—it’s also a fantastic way to transform simple ingredients into something creamy, dreamy, and utterly satisfying.
Ingredients
- 2 cups of bread, crusts removed and cut into cubes
- 2 cups of heavy cream
- 1 cup of whole milk
- 3/4 cup of sugar
- 1 teaspoon of vanilla extract
- A pinch of salt
Instructions
1. Blend It All Up
Let’s get started! Grab your blender and toss in those delightful bread cubes. Add the heavy cream, whole milk, sugar, vanilla extract, and a sprinkle of salt. Blend everything together until the mixture is super smooth and creamy. It’s like a little magic moment in your kitchen!
2. Chill, Baby, Chill
Pour the blended mixture into a bowl, cover it with plastic wrap, and pop it into the fridge for at least 2 hours. This magic step helps the flavors develop and gives your ice cream that smooth texture we all crave.
3. Churn It Up!
After your mixture has chilled, take it out and pour it into your ice cream maker. Follow the manufacturer’s instructions to churn it until it reaches that perfect creamy consistency. Honestly, the sound of the churning is music to my ears—it’s like a sweet symphony of dessert coming together! 🎶
4. Freeze for Perfection
Transfer your ice cream to an airtight container and freeze it for at least 4 hours. I know, I know—waiting is the hardest part, but trust me, it’s worth it!
Notes
- Old Bread? No Problem! Got some bread lying around that’s a bit stale? Perfect! Stale bread works wonders in this recipe, lending flavor and texture without any waste.
- Flavor Variations: Feeling adventurous? You can stir in some chocolate chips, nuts, or even a swirl of caramel before the freezing step!
- Don’t Panic! If your mixture looks a bit lumpy post-blending, that’s totally normal. It’s all part of the charm of homemade ice cream!
