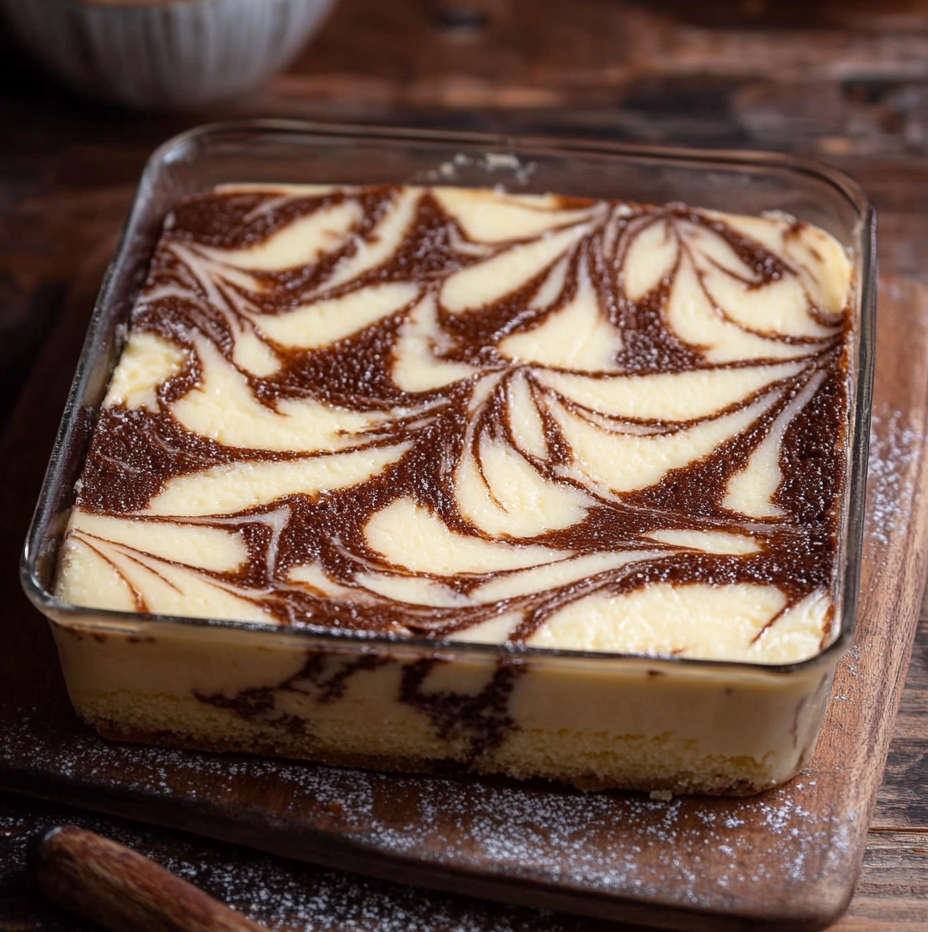
Hey there, fellow dessert lovers! Today, we’re diving into the world of a scrumptious delight that’s bound to make you swoon: the Marble Butter Sponge Cake. If you’re looking for a cake that’s light, airy, and combines the perfect swirl of rich chocolate and comforting vanilla, you’ve come to the right place! This is the kind of cake that deserves a spot on your dessert table and is sure to impress everyone from your kids to your book club pals.
Why You’ll Love This Marble Butter Sponge Cake
Let’s face it, we’re all incredibly busy—between work, family, and social commitments, finding the time to whip up something delicious can feel like a superhero challenge. Fear not! This Marble Butter Sponge Cake is not only simple to make but also incredibly rewarding. Imagine presenting a cake that looks like a work of art while being oh-so-easy to put together. Plus, it’s a surefire way to transform an ordinary day into a sweet celebration!
Ingredients
Let’s gather our magical ingredients to create this masterpiece:
- 1 cup unsalted butter, softened
- 1 cup granulated sugar
- 4 large eggs
- 2 cups all-purpose flour
- 1/2 cup milk
- 2 teaspoons baking powder
- 1 teaspoon vanilla extract
- 2 tablespoons cocoa powder
Steps to Cake Perfection
Alright, ladies (and gents!), it’s time to roll up our sleeves and get baking! Here’s how you can bring this beauty to life:
- Preheat the Oven: Start by preheating your oven to 350°F (175°C). Don’t forget to grease and flour your cake pan—nobody likes a stuck cake, am I right?
- Cream the Butter and Sugar: In a large mixing bowl, cream together the softened butter and sugar until you reach that light and fluffy consistency. This step is crucial for that luscious texture we’re after!
- Incorporate the Eggs: Add in the eggs one by one, making sure to beat well after each addition. The eggs will help bring our cake to life.
- Mix the Dry Ingredients: In another bowl, sift the flour with the baking powder. Sifting is like giving your flour a little spa day—it makes all the difference in the end result!
- Combine Wet and Dry: Gradually add the flour mixture to the creamed butter mix, alternating with the milk. Keep stirring until it’s all smooth and delightful, then stir in the vanilla extract.
- Add the Chocolate Swirl: Here comes the fun part! Divide the batter in half. To one half, mix in the cocoa powder. Now you’ve got a lovely chocolatey mixture just begging to be swirled!
- Layer the Batters: Spoon the vanilla and chocolate batters into your prepared pan, alternating and layering them. Get creative—don’t worry about being perfect with the layers!
- Create a Marble Effect: Take a knife and gently swirl through the batters to create beautiful patterns. Picture this cake and all its divine swirls!
- Bake to Perfection: Bake for 25-30 minutes (yes, it smells heavenly in there!). Check with a toothpick—if it comes out clean, you’re good to go.
- Cooling Time: Allow your cake to cool in the pan for about 10 minutes before transferring it to a wire rack to cool completely. This is the moment your patience pays off!
Cooking Tips
A few quick tips to make your baking journey even smoother:
- If your cake doesn’t rise as much as you’d like, double-check that your baking powder is fresh. A flat cake is no one’s friend!
- Going for a fancy finish? Once cooled, drizzle some melted chocolate or icing on top. It’s an easy way to elevate your dessert game.
A Taste of Nostalgia
I can’t help but think of my childhood every time I whip up this Marble Butter Sponge Cake. It was a family favorite at birthdays and gatherings, and my sister Patricia and I would sneak bites when we thought no one was looking. This cake has a special place in my heart, and I bet it will find a special spot in yours, too!
FAQs
Can I substitute butter for oil in this recipe? While butter adds amazing flavor and a delightful texture, you can use oil if you’re in a pinch. Just remember, the taste might be a bit different!
How can I store leftovers? If you have any leftovers (which is a big “if”!), store them in an airtight container. They’re best enjoyed within a couple of days, but let’s be honest—you might not have any left to store!
Can I freeze the Marble Butter Sponge Cake? Absolutely! Wrap it tightly in plastic wrap and then in foil, and freeze for up to 3 months. Just thaw it at room temperature when you’re ready to enjoy again.
Well, there you have it, folks! This Marble Butter Sponge Cake is an easy, scrumptious treat perfect for any occasion. Whether you’re celebrating something special or just satisfying a sweet tooth, this cake has got you covered. So go ahead, grab your apron and make some magic happen in your kitchen. And remember, cooking is all about joy, love, and the memories we create along the way!
Happy baking! 🍰❤️
For more delightful desserts and recipe insights, check out my other posts, like Classic Chocolate Chip Cookies or Lemon Blueberry Muffins. Let’s keep spreading the joy of cooking together!
Print
The Ultimate Marble Butter Sponge Cake
Description
Hey there, fellow dessert lovers! Today, we’re diving into the world of a scrumptious delight that’s bound to make you swoon: the Marble Butter Sponge Cake. If you’re looking for a cake that’s light, airy, and combines the perfect swirl of rich chocolate and comforting vanilla, you’ve come to the right place! This is the kind of cake that deserves a spot on your dessert table and is sure to impress everyone from your kids to your book club pals.
Ingredients
- 1 cup unsalted butter, softened
- 1 cup granulated sugar
- 4 large eggs
- 2 cups all-purpose flour
- 1/2 cup milk
- 2 teaspoons baking powder
- 1 teaspoon vanilla extract
- 2 tablespoons cocoa powder
Instructions
- Preheat the Oven: Start by preheating your oven to 350°F (175°C). Don’t forget to grease and flour your cake pan—nobody likes a stuck cake, am I right?
- Cream the Butter and Sugar: In a large mixing bowl, cream together the softened butter and sugar until you reach that light and fluffy consistency. This step is crucial for that luscious texture we’re after!
- Incorporate the Eggs: Add in the eggs one by one, making sure to beat well after each addition. The eggs will help bring our cake to life.
- Mix the Dry Ingredients: In another bowl, sift the flour with the baking powder. Sifting is like giving your flour a little spa day—it makes all the difference in the end result!
- Combine Wet and Dry: Gradually add the flour mixture to the creamed butter mix, alternating with the milk. Keep stirring until it’s all smooth and delightful, then stir in the vanilla extract.
- Add the Chocolate Swirl: Here comes the fun part! Divide the batter in half. To one half, mix in the cocoa powder. Now you’ve got a lovely chocolatey mixture just begging to be swirled!
- Layer the Batters: Spoon the vanilla and chocolate batters into your prepared pan, alternating and layering them. Get creative—don’t worry about being perfect with the layers!
- Create a Marble Effect: Take a knife and gently swirl through the batters to create beautiful patterns. Picture this cake and all its divine swirls!
- Bake to Perfection: Bake for 25-30 minutes (yes, it smells heavenly in there!). Check with a toothpick—if it comes out clean, you’re good to go.
- Cooling Time: Allow your cake to cool in the pan for about 10 minutes before transferring it to a wire rack to cool completely. This is the moment your patience pays off!
- If your cake doesn’t rise as much as you’d like, double-check that your baking powder is fresh. A flat cake is no one’s friend!
- Going for a fancy finish? Once cooled, drizzle some melted chocolate or icing on top. It’s an easy way to elevate your dessert game.
Notes
- If your cake doesn’t rise as much as you’d like, double-check that your baking powder is fresh. A flat cake is no one’s friend!
- Going for a fancy finish? Once cooled, drizzle some melted chocolate or icing on top. It’s an easy way to elevate your dessert game.
