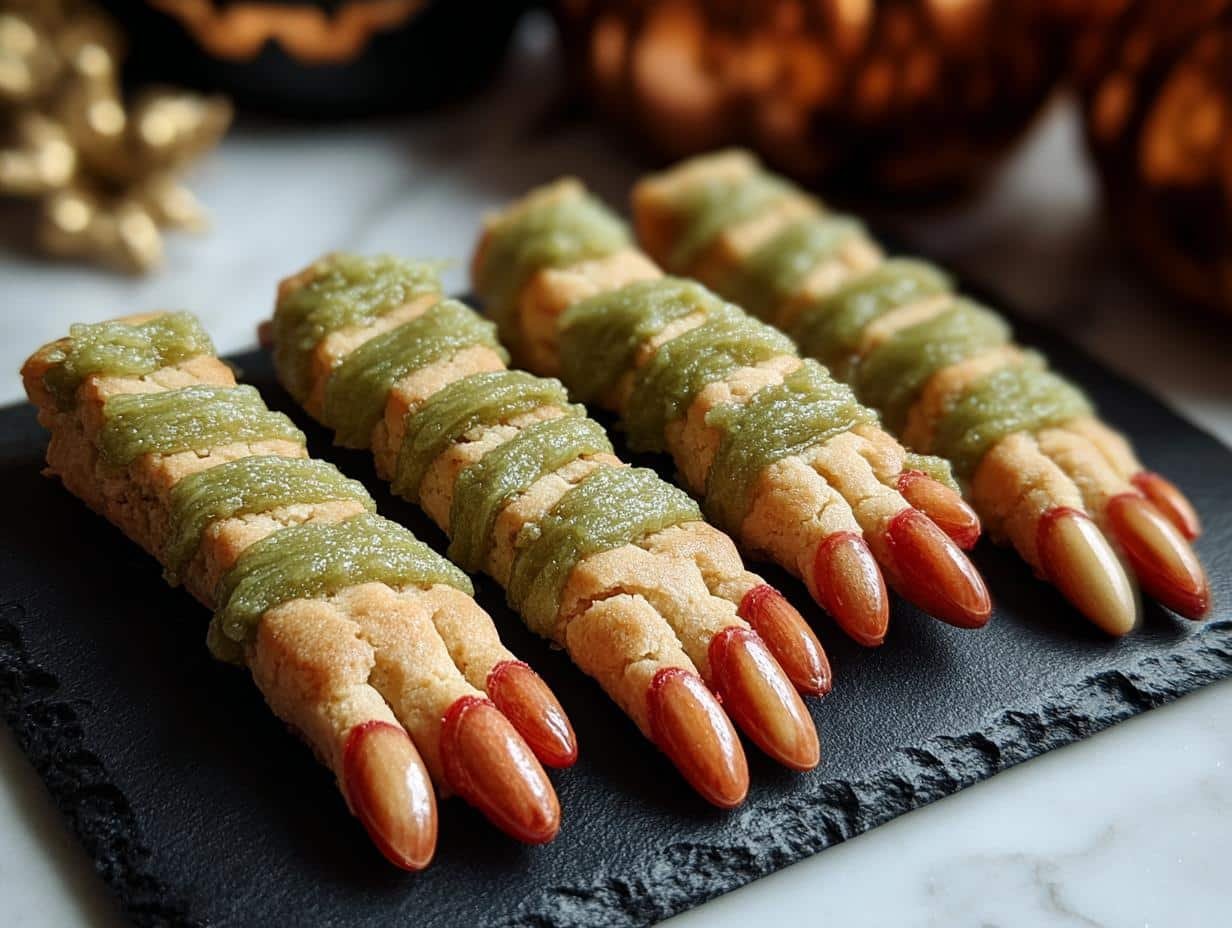
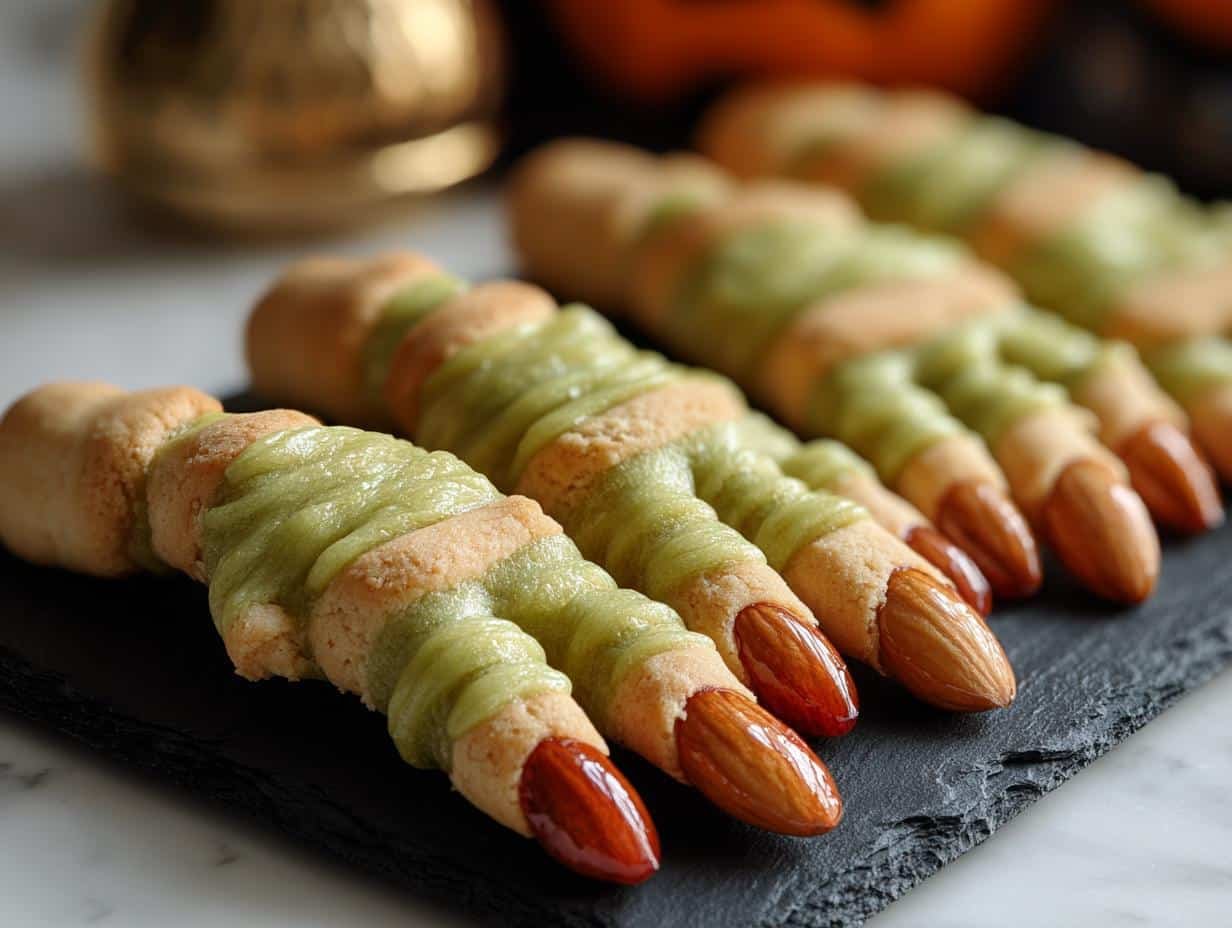
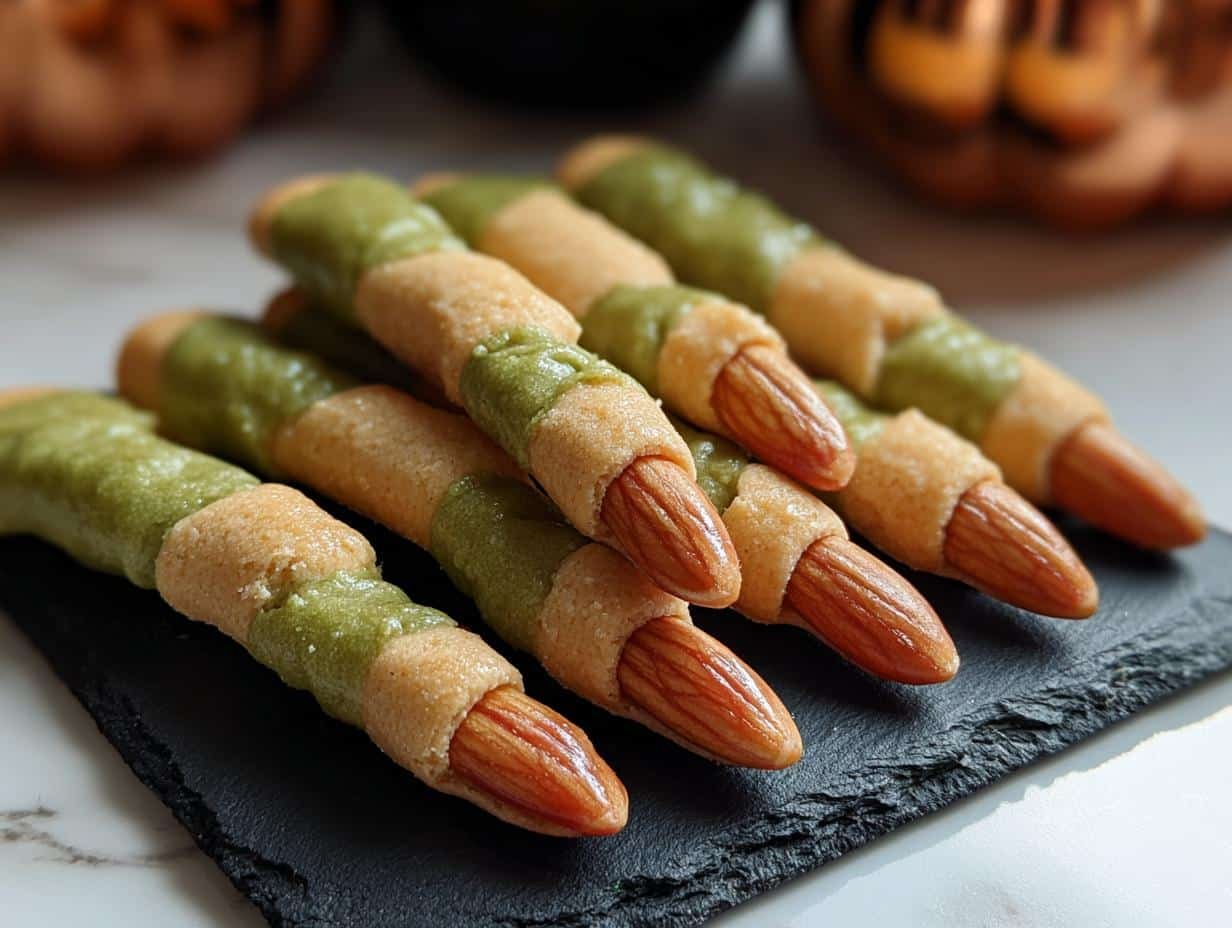
Halloween Witches Fingers have always been my go-to for a truly spooky bake, and this recipe is a game-changer! Ever since I was a kid, the sight of these creepy, crooked fingers at Halloween parties sent delightful shivers down my spine. The buttery, crisp texture of these shortbread cookies is just perfect, and the almond ‘nails’ add such a fun, realistic touch. I remember one year, my mom even used red gel to make them look extra gruesome – it was a huge hit! Making these Halloween witch finger cookies is a tradition I now share with my own family. Let’s get cooking!
Why You’ll Love These Halloween Witches Fingers
- The taste is wonderfully buttery and crisp, a classic shortbread that’s utterly delicious.
- Prep time is a breeze, making them perfect for busy Halloween evenings.
- They’re surprisingly budget-friendly, using common pantry staples.
- These are incredibly family-friendly and a fantastic activity to do with kids.
- The spooky appearance is a guaranteed hit at any Halloween party or gathering.
- These witch finger cookies are a fun twist on traditional holiday treats.
- They offer a great base for customization with different food colorings.
- You’ll love how these witch finger cookies impress guests with their creepy charm.
Ingredients for Halloween Witches Fingers
Crafting these spooky witch finger treats is simple with just a few key ingredients. The softened butter and powdered sugar create a tender, melt-in-your-mouth base for our cookies. I always use room temperature eggs and vanilla extract for the best emulsification. For the dry ingredients, the all-purpose flour provides structure, while baking powder gives a slight lift, and salt balances the sweetness. You’ll need blanched almonds for those perfectly creepy fingernails that make these Halloween Witches Fingers so iconic. If you’re feeling extra daring, a little green food coloring and red decorating gel add that extra frightful touch to your spooky witch finger treats.
- 1 cup (226g) unsalted butter, softened – essential for that buttery crispness
- 1 cup (120g) powdered sugar – creates a tender cookie texture
- 1 large egg – helps bind the dough
- 1 teaspoon vanilla extract – for a classic sweet flavor
- 2 3/4 cups (340g) all-purpose flour – the main structure of the cookie
- 1 teaspoon baking powder – for a touch of lift
- 1/2 teaspoon salt – balances the sweetness
- 24 blanched almonds – for those creepy fingernails
- 1 small tube red decorating gel (optional) – for an extra gory touch
- Green food coloring (optional) – to get that perfect witchy hue
How to Make Halloween Witches Fingers
Get ready to create some seriously spooky treats! These Halloween Witches Fingers are surprisingly easy to whip up and will be the star of your dessert table.
- Step 1: Preheat your oven to 325°F (165°C). Line a baking sheet with parchment paper. This ensures your cookies don’t stick and bake evenly.
- Step 2: In a large bowl, cream together the softened butter and powdered sugar until the mixture is light and fluffy. This is where the magic starts for that perfect buttery cookie base!
- Step 3: Beat in the egg and vanilla extract. If you’re going for a green hue, now’s the time to add a few drops of green food coloring and mix until you achieve your desired shade.
- Step 4: In a separate bowl, whisk together the flour, baking powder, and salt. Gradually add this dry mixture to the wet ingredients, mixing until a cohesive dough forms.
- Step 5: Wrap the dough tightly in plastic wrap and chill it in the refrigerator for at least 30 minutes. This step is crucial for making the dough easier to handle and shape.
- Step 6: Once chilled, roll tablespoon-sized portions of dough into finger shapes. Aim for a shape that’s slightly thinner in the middle, like a real finger.
- Step 7: Place a blanched almond at one end of each cookie to serve as a fingernail. Use the back of a knife or a toothpick to gently score lines for knuckles and pinch the dough in the middle to create a more realistic, gnarled effect. Now you have truly edible witch fingers!
- Step 8: Arrange the shaped cookies on the prepared baking sheet, leaving a little space between them. Bake for 20–25 minutes, or until the edges just begin to turn golden. You’ll notice a wonderful buttery aroma filling your kitchen.
- Step 9: Let the Halloween Witches Fingers cool on the baking sheet for a few minutes before carefully transferring them to a wire rack to cool completely.
- Step 10: Feeling extra creepy? Carefully remove the almond ‘nail,’ dab a tiny bit of red decorating gel underneath, and gently press the almond back into place. This creates a wonderfully gruesome ‘bloody nail’ look, making these edible witch fingers even more frighteningly fun.
Pro Tips for the Best Halloween Witches Fingers
I’ve learned a few tricks over the years to make these cookies truly spectacular. Follow these tips for the most authentic and delicious spooky treats!
- Chill your dough thoroughly; it’s the key to preventing them from spreading and losing their finger shape.
- Don’t overmix the dough once you add the flour, as this can lead to tough cookies.
- Use blanched almonds for a cleaner, more realistic nail appearance.
- Create deep knuckle lines with a knife or skewer for that extra gnarled, witchy look.
What’s the secret to perfect Halloween Witches Fingers?
The secret is all about the dough consistency and shaping. Making sure the dough is well-chilled prevents spreading, and scoring those deep knuckle lines really sells the spooky effect. It’s these little details that make them such great creepy witch finger snacks.
Can I make Halloween Witches Fingers ahead of time?
Absolutely! You can prepare the dough, shape the fingers (without the almond), and freeze them on a baking sheet until firm. Then, transfer them to an airtight container. Bake directly from frozen, adding a few extra minutes to the baking time.
How do I avoid common mistakes with Halloween Witches Fingers?
A common mistake is not chilling the dough enough, causing the fingers to spread. Another pitfall is not scoring the knuckles deeply enough. Also, avoid baking them too long; they should be pale with just slightly golden edges to maintain their tender texture.
Best Ways to Serve Halloween Witches Fingers
These spooky cookies are fantastic on their own, but I love presenting them in a few creative ways that really amp up the Halloween vibe. They make a wonderfully creepy addition to any dessert platter at a party. Imagine a spread of ghoulish goodies, and these definitely steal the show!
- Arrange them on a platter with other Halloween treats like candy corn and chocolate eyeballs for a festive dessert board. They pair beautifully with a creamy pumpkin dip.
- Serve them as part of a “witch’s brew” theme, alongside green punch or bubbling cauldron cupcakes.
- Present them in small cellophane bags tied with orange ribbon as charming party favors. This is a great way to showcase how to make witch fingers for Halloween that guests can take home.

Nutrition Facts for Halloween Witches Fingers
Here’s a breakdown of the nutritional information for these spooky treats. These estimates can help you understand what you’re serving at your Halloween party.
- Calories: 180
- Fat: 10g
- Saturated Fat: 6g
- Protein: 2g
- Carbohydrates: 22g
- Fiber: 1g
- Sugar: 12g
- Sodium: 75mg
Nutritional values are estimates and may vary based on specific ingredients used.
How to Store and Reheat Halloween Witches Fingers
Once your creepy creations have cooled completely, it’s time to think about storing these Halloween Witches Fingers. Properly storing them ensures they stay fresh and spooky for your party. First, make sure they are totally cool to the touch; storing warm cookies can lead to sogginess. I like to place them in an airtight container, layering them between parchment paper if I’m stacking them. This helps prevent them from sticking together and breaking.
For short-term storage, these cookies will keep well in an airtight container at room temperature for about 3-4 days. If you need them to last longer, you can pop them in the refrigerator for up to a week. For long-term storage, freeze your Halloween party finger snacks! Wrap them well in plastic wrap, then in foil, and freeze for up to 3 months. To reheat, simply bring them to room temperature, or warm them gently in a low oven (around 300°F or 150°C) for a few minutes to refresh their crispness.
Frequently Asked Questions About Halloween Witches Fingers
What makes these Halloween Witches Fingers so spooky?
It’s all about the details! The slightly curved, gnarled shape, the knuckle lines scored with a knife, and that perfectly placed almond ‘nail’ all contribute to their creepy appearance. Adding a dab of red decorating gel under the almond makes them look extra gruesome, turning them into truly frightful Halloween spooky finger food.
Can I use different nuts for the fingernails?
While blanched almonds are classic, you can certainly get creative! Sliced slivered almonds, chopped pecans, or even small pieces of candied ginger can work as unique ‘nails.’ Just make sure they’re appropriately sized so they don’t overpower the cookie itself. Experimenting with different nuts is a fun way to add a personal touch to your witch finger cookies.
How do I get the green color to look natural?
The key is to add green food coloring gradually to the dough mixture after creaming the butter and sugar. Mix it in slowly, a drop or two at a time, until you achieve a subtle, mottled green shade rather than a solid, uniform color. This mimics the look of a real witch’s finger and makes your Halloween spooky finger food even more convincing.
Can I make these Halloween Witches Fingers gluten-free?
Yes, you can! Simply substitute the all-purpose flour with a good quality gluten-free all-purpose baking blend that contains xanthan gum. You might need to adjust the liquid slightly, so start with a little less flour and add more if the dough seems too wet. The texture might be slightly different, but you’ll still get wonderfully spooky gluten-free witch finger cookies.
Variations of Halloween Witches Fingers You Can Try
While this recipe is fantastic, there are so many fun ways to customize your Halloween Witches Fingers to fit your needs and preferences. Let’s explore some creative twists on these classic spooky treats!
- Dietary Needs: For gluten-free guests, simply swap out the all-purpose flour for a 1:1 gluten-free baking blend. Ensure your blend contains xanthan gum for the best texture. You can also make them dairy-free by using a plant-based butter substitute.
- Flavor Boosts: Add a teaspoon of almond extract along with the vanilla for a stronger nutty flavor that complements the almond ‘nails.’ A pinch of cinnamon or nutmeg can also add a warm, unexpected spice to these witch finger dessert ideas.
- Cooking Methods: While baking is traditional, you could experiment with air frying these cookies at 300°F (150°C) for about 10-12 minutes, checking for golden edges. This might give them an even crisper texture.
- Color Variations: Don’t feel limited to green! Try a deep purple, a ghostly white, or even a black dough for different spooky effects. These variations keep your witch finger dessert ideas fresh and exciting every year.

Spooky Halloween Witches Fingers: 10 Delicious Tips
- Total Time: 40 minutes
- Yield: 24 witches fingers 1x
- Diet: Vegetarian
Description
Delicious and spooky Halloween Witches Fingers cookies that look like creepy witches’ fingers. These buttery, crisp shortbread cookies are easy to make and perfect for Halloween parties, offering a fun and frightful treat for kids and adults alike. Decorate with almond ‘nails’ and optional red gel for an extra eerie touch.
Ingredients
- 1 cup (226g) unsalted butter, softened
- 1 cup (120g) powdered sugar
- 1 large egg
- 1 teaspoon vanilla extract
- 2 3/4 cups (340g) all-purpose flour
- 1 teaspoon baking powder
- 1/2 teaspoon salt
- 24 blanched almonds
- 1 small tube red decorating gel (optional)
- Green food coloring (optional)
Instructions
- Cream the butter and powdered sugar until the mixture becomes light and fluffy.
- Mix in the egg and vanilla extract. If desired, add a few drops of green food coloring and mix thoroughly.
- In a separate bowl, whisk together the flour, baking powder, and salt. Slowly add this to the wet mixture to form your dough.
- Wrap the dough in plastic wrap and chill for at least 30 minutes.
- Preheat the oven to 325°F (165°C). Roll tablespoon-sized pieces of dough into finger shapes, making them slightly thinner than a real finger.
- Place an almond at one end to resemble a fingernail. Use a knife or toothpick to make knuckle lines and pinch the center for a more realistic effect.
- Bake for 20–25 minutes, or until the edges begin to turn golden. Let them cool on a wire rack.
- For added spookiness, optionally remove the almond, add a bit of red decorating gel underneath, and replace the almond to create a ‘bloody nail’ look.
Notes
- Chill the dough sufficiently to maintain shape during baking.
- Use blanched almonds for a clean, nail-like appearance.
- Adjust food coloring gradually for the desired green shade.
- Create deep indentations for realistic knuckle details.
- Keep the fingers slim as they will expand while baking.
- Store in an airtight container at room temperature for up to 3 days or refrigerate for up to a week.
- Unbaked dough fingers can be frozen for later use; add 2-3 minutes to baking time when baking from frozen.
- Prep Time: 15 minutes
- Cook Time: 25 minutes
- Category: Dessert
- Method: Baking
- Cuisine: Halloween
Nutrition
- Serving Size: 1 finger

