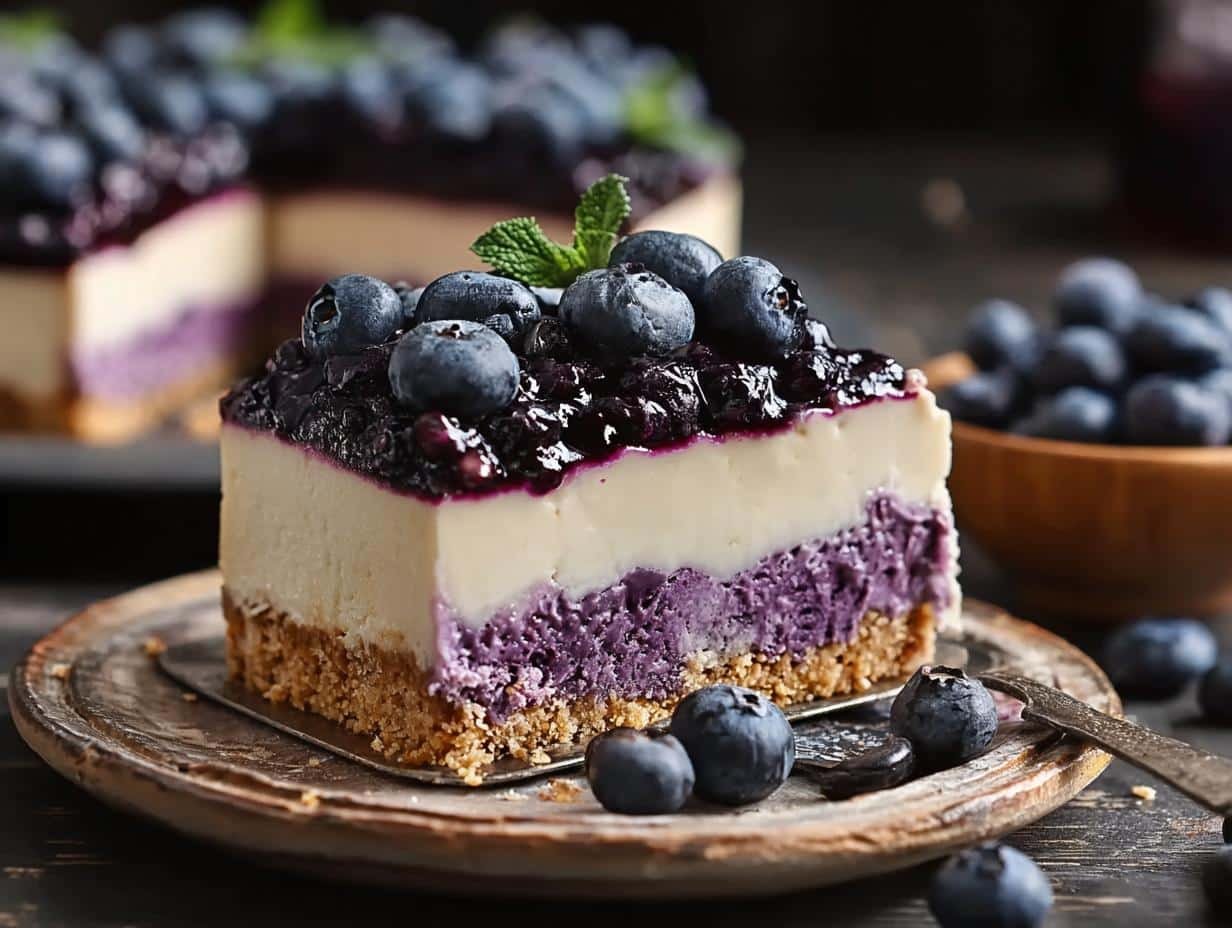
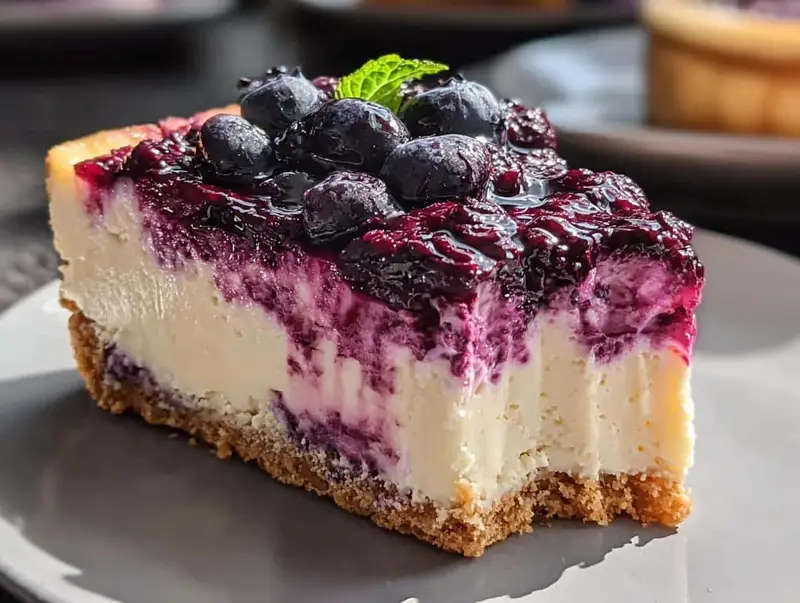
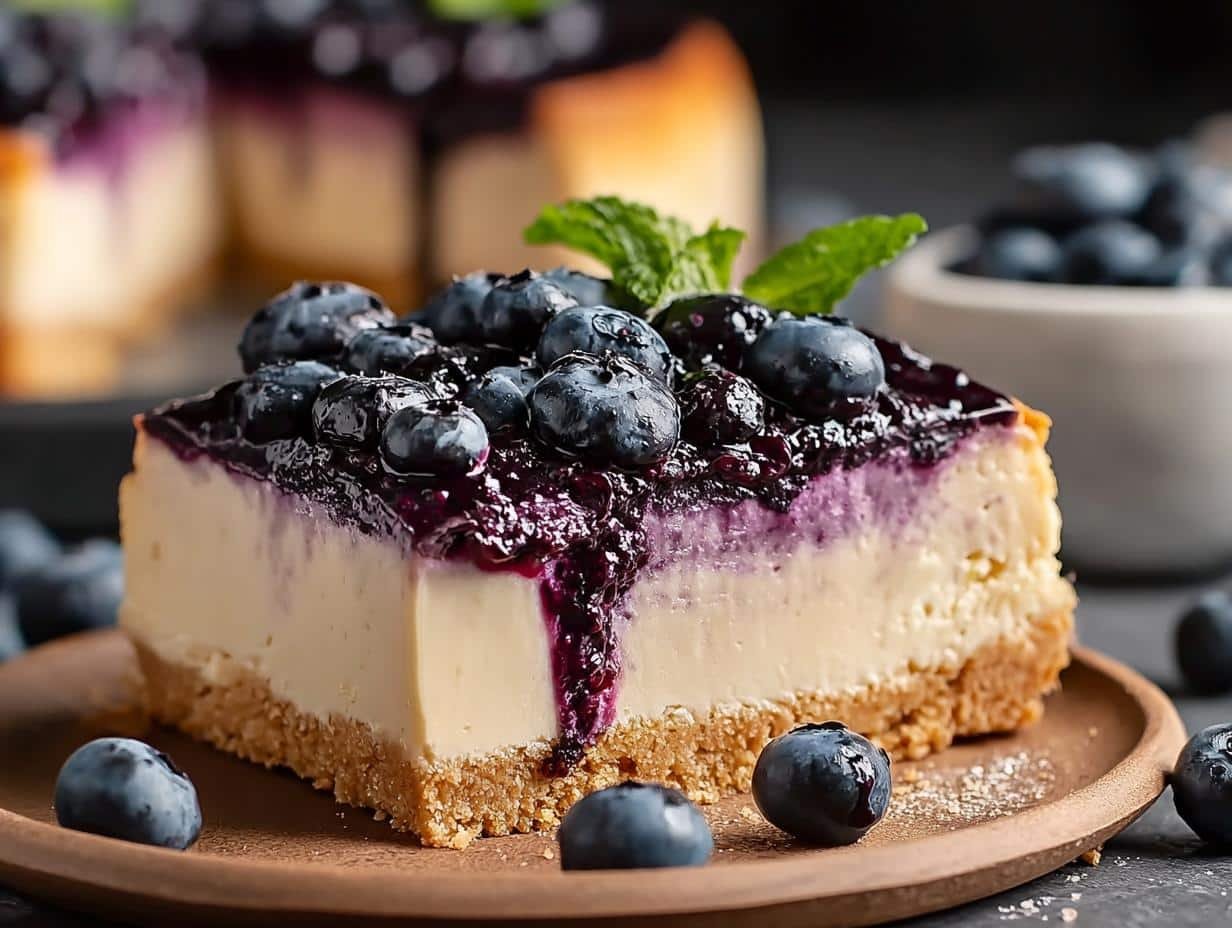
Dreamy Bake Blueberry Cheesecake has been a showstopper in my family for years, a dessert that whispers of summer picnics and lazy afternoons. I first encountered this heavenly creation at a friend’s barbecue, and the moment I took a bite, I was hooked. The texture was so unbelievably creamy, like velvet on my tongue, and the sweet-tart burst of fresh blueberries was pure perfection. This Dreamy No-Bake Blueberry Cheesecake Recipe is my go-to for impressing guests without spending hours in the kitchen. It’s wonderfully moist and bursting with flavor. Let’s get this easy dessert assembled!
Why You’ll Love This Dreamy Bake Blueberry Cheesecake
You’re going to adore this dessert for so many reasons! It’s the ultimate treat that brings smiles to every face.
- Effortless No-Bake Preparation: Forget the oven! This recipe is incredibly simple, making it perfect for even beginner bakers.
- Incredibly Creamy Texture: The filling is luxuriously smooth and rich, melting in your mouth with every bite. It’s a truly creamy Dreamy Bake Blueberry Cheesecake experience.
- Bursting with Fresh Blueberry Flavor: We use plenty of fresh blueberries, both in the filling and as a vibrant topping, for an intense fruity taste.
- Perfect for Any Occasion: Whether it’s a holiday gathering, a birthday party, or just a weeknight treat, this cheesecake fits the bill beautifully.
- Visually Stunning Presentation: The beautiful purple topping and smooth surface make this a showstopper that looks as good as it tastes.
- Customizable Crust and Topping: Feel free to experiment with different crusts or fruit toppings to make it your own unique Dreamy Bake Blueberry Cheesecake.
- A Crowd-Pleaser Guaranteed: Seriously, everyone raves about this dessert. It’s a fail-proof way to impress your friends and family.
Ingredients for Dreamy Bake Blueberry Cheesecake
Gathering these simple ingredients is the first step to creating your own homemade Dreamy Bake Blueberry Cheesecake. I love how accessible everything is, making this a go-to recipe whenever a craving strikes!
For the Graham Cracker Crust
- 2 cups graham cracker crumbs – These form the perfect crunchy base for our creamy filling.
- ½ cup unsalted butter, melted – This helps bind the crumbs together and adds a subtle richness.
- 2 tablespoons granulated sugar – Just a touch of sweetness to complement the graham crackers.
For the Creamy Cheesecake Filling
- 16 ounces cream cheese, softened – This is the heart of our cheesecake! Make sure it’s at room temperature so it blends into a silky smooth texture without lumps.
- 1 cup powdered sugar – For that classic sweet cheesecake flavor.
- 1 teaspoon vanilla extract – A little vanilla goes a long way to enhance the overall taste.
- 1 cup heavy whipping cream – Whipped to stiff peaks, this adds incredible lightness and that signature creamy, dreamy texture.
- 2 cups fresh blueberries – These little gems are folded into the filling for bursts of fruity goodness.
- 1 tablespoon lemon juice – A hint of acidity brightens the blueberry flavor and cuts through the richness.
For the Vibrant Blueberry Topping
- 2 cups fresh blueberries – More of those beautiful berries for a gorgeous, flavorful topping.
- 1 tablespoon lemon juice – To enhance the berry flavor.
- 1 tablespoon cornstarch (optional for thickening) – If you prefer a thicker, more jam-like topping, a little cornstarch does the trick.
How to Make Dreamy Bake Blueberry Cheesecake
Let’s get this Dreamy Bake Blueberry Cheesecake assembled! This recipe is a breeze, and the results are absolutely divine. You’ll be amazed at how simple it is to create such a show-stopping dessert.
Preparing the No-Bake Crust
First things first, let’s get that perfect base ready. In a medium bowl, combine the 2 cups graham cracker crumbs, ½ cup unsalted butter, melted, and 2 tablespoons granulated sugar. Give it a good stir until it all looks like wet sand. This mixture will form the delicious foundation of your cheesecake. Press this crumb mixture firmly and evenly into the bottom of your 9-inch springform pan. I like to use the bottom of a glass or measuring cup to get it nice and compact. Pop this into the refrigerator to chill while we whip up the filling – this helps it set up nicely.
Crafting the Creamy Filling
Now for the star of the show: the creamy filling! In a large bowl, beat together the 16 ounces cream cheese, softened (this is key for smoothness!), and 1 cup powdered sugar with an electric mixer until it’s completely smooth and lump-free. Next, mix in the 1 teaspoon vanilla extract. In a separate bowl, whip the 1 cup heavy whipping cream until stiff peaks form. This is what gives our cheesecake its wonderfully light and airy texture. Gently fold the whipped cream into the cream cheese mixture until just combined. Be careful not to overmix! Finally, gently fold in the 2 cups fresh blueberries and the 1 tablespoon lemon juice. This step is where the magic truly happens, creating pockets of fruity goodness throughout the creamy filling.
Assembling and Chilling the Cheesecake
With your crust chilled and your filling ready, it’s time to bring it all together. Carefully pour the creamy blueberry filling over the chilled graham cracker crust in the springform pan. Use a spatula to smooth the top evenly. This is where the Dreamy Bake No Bake Blueberry Cheesecake really starts to take shape. Once smoothed, cover the pan tightly with plastic wrap. Now comes the hardest part – waiting! You’ll need to chill the cheesecake in the refrigerator for at least 4 to 5 hours, or ideally overnight, to allow it to fully set and develop its incredible texture.
Creating the Delicious Blueberry Topping
While the cheesecake chills, let’s make that gorgeous, vibrant topping. In a small saucepan, combine 2 cups fresh blueberries, 1 tablespoon lemon juice, and if you want a thicker topping, 1 tablespoon cornstarch. Cook this mixture over medium heat, stirring gently, until the blueberries start to burst and release their juices, and the sauce thickens slightly. This usually takes about 5-7 minutes. If you skipped the cornstarch, just cook until the berries are softened and the sauce has reduced a bit. Let this delicious topping cool completely before you use it.
Final Touches and Serving
Once your cheesecake is fully chilled and firm, it’s time for the grand finale! Carefully remove the sides of the springform pan. You can run a thin knife around the edge first if needed to loosen it. Spoon the cooled blueberry topping generously over the top of the cheesecake. Add a few extra fresh blueberries for garnish if you like. This final touch makes your homemade Dreamy Bake Blueberry Cheesecake look absolutely stunning. Slice it up and serve chilled. Enjoy every creamy, fruity bite!
Pro Tips for the Best Dreamy Bake Blueberry Cheesecake
I’ve learned a few tricks over the years to make this dessert absolutely perfect. Following these simple tips will ensure your cheesecake is a showstopper!
- Always make sure your cream cheese is truly softened to room temperature. This is the most crucial step for achieving a perfectly smooth and creamy filling.
- Don’t overwhip the heavy cream; you want stiff peaks, but overwhipping can make the filling grainy. Gently fold it in to keep that airy texture.
- Chill the crust thoroughly before adding the filling. This helps create a firm base that won’t crumble when you slice into your beautiful cheesecake.
What’s the secret to a perfectly creamy Dreamy Bake Blueberry Cheesecake?
The secret is using softened cream cheese and gently folding in whipped heavy cream. This combination creates an incredibly light, smooth, and melt-in-your-mouth texture that defines this creamy Dreamy Bake Blueberry Cheesecake.
Can I make Dreamy Bake Blueberry Cheesecake ahead of time?
Absolutely! This Dreamy Bake Blueberry Cheesecake is even better when made a day in advance, allowing the flavors to meld and the texture to fully set. Store it covered in the refrigerator.
How do I avoid common mistakes with Dreamy Bake Blueberry Cheesecake?
Ensure your cream cheese is fully softened to prevent lumps. Don’t overmix after adding the whipped cream, and always allow adequate chilling time for the cheesecake to firm up properly.
Best Ways to Serve Dreamy Bake Blueberry Cheesecake
This delightful dessert is wonderful on its own, but a few simple additions can elevate your experience even further. Whether you’re serving it at a special event or just enjoying a quiet moment, these ideas will make your Dreamy Bake Blueberry Cheesecake shine.
Classic Serving Suggestions
Honestly, this cheesecake is so good, it doesn’t need much! A simple dollop of freshly whipped cream or a small spoonful of sour cream on the side is perfection. The creaminess enhances the cheesecake’s texture beautifully.
Complementary Pairings
For a delightful afternoon treat, pair a slice of this creamy Dreamy Bake Blueberry Cheesecake with a hot cup of coffee or a fragrant herbal tea. If you’re serving it as part of a larger meal, it also complements a light, fresh green salad wonderfully, offering a sweet finish to balance savory flavors.
Elevating the Presentation
To make your homemade Dreamy Bake Blueberry Cheesecake truly pop, consider a few garnishes. A sprig of fresh mint adds a lovely pop of green and a refreshing aroma. A few extra fresh blueberries scattered artfully on top or around the slice look gorgeous and reinforce the star flavor.
Nutrition Facts for Dreamy Bake Blueberry Cheesecake
This Dreamy Bake Blueberry Cheesecake is a delightful treat that balances flavor and richness. Here’s a look at the estimated nutritional breakdown per serving:
- Calories: 250 kcal
- Fat: 15g
- Saturated Fat: 9g
- Protein: 3g
- Carbohydrates: 25g
- Fiber: 1g
- Sugar: 20g
- Sodium: 150mg
Nutritional values are estimates and may vary based on specific ingredients used and portion sizes.
How to Store and Reheat Dreamy Bake Blueberry Cheesecake
Keeping your Dreamy Bake Blueberry Cheesecake fresh is simple, ensuring you can enjoy every last bite. This dessert is best served chilled, but knowing how to store it properly is key. Once your beautiful cheesecake has fully cooled, you’ll want to get it into a proper container to maintain its delightful texture and flavor. This makes it easy to grab a slice whenever a craving strikes!
Storing Leftover Cheesecake
To store leftover Dreamy Bake Blueberry Cheesecake, first ensure it has completely cooled. Then, cover it tightly with plastic wrap or place it in an airtight container. Refrigerated, it will stay deliciously fresh for about 3 to 4 days. If you need to store it for longer, you can freeze it! Once chilled and firm, wrap individual slices or the entire cheesecake tightly in plastic wrap, followed by a layer of aluminum foil or a freezer-safe bag. This helps prevent freezer burn. Properly stored, your homemade cheesecake can last in the freezer for up to 3 months.
Reheating Tips
Typically, this Dreamy Bake Blueberry Cheesecake is best enjoyed cold. However, if you find yourself with a frozen slice that needs thawing, the best method is to transfer it from the freezer to the refrigerator overnight. This allows it to defrost slowly and evenly, maintaining its creamy texture. For slices that have been refrigerated, no reheating is usually necessary. Simply take it out a few minutes before serving to let it soften slightly, ensuring that signature melt-in-your-mouth consistency.
Frequently Asked Questions About Dreamy Bake Blueberry Cheesecake
Got questions about making this delightful dessert? I’ve got answers to help you create the perfect Dreamy Bake Blueberry Cheesecake every single time. Don’t worry if you’re new to cheesecake making; these tips will guide you!
Can I use frozen blueberries for the topping?
Yes, you absolutely can use frozen blueberries for the topping! Thaw them first and drain off any excess liquid. You might need to cook them a little longer to achieve the desired thickness, and if you’re using cornstarch, you may need a bit more to thicken the released juices. This is a great way to enjoy this Dreamy Bake Blueberry Cheesecake year-round.
What kind of crust is best for this cheesecake?
The classic graham cracker crust is absolutely fantastic for this cheesecake, offering a perfect balance of sweetness and crunch. However, you can get creative! For a different flavor profile, try a vanilla wafer crust, a digestive biscuit crust, or even a nutty crust made from crushed almonds or pecans. For a gluten-free option, use gluten-free graham cracker crumbs or finely ground nuts.
Why is my cheesecake filling not firming up?
If your creamy Dreamy Bake Blueberry Cheesecake filling isn’t firming up, it’s usually due to insufficient chilling time or the cream cheese not being soft enough. Ensure you’ve chilled it for at least 4-5 hours, preferably overnight. Also, make sure your cream cheese was at true room temperature when you started mixing to avoid lumps and ensure proper setting. Sometimes, not whipping the cream to stiff peaks can also affect firmness.
Variations of Dreamy Bake Blueberry Cheesecake You Can Try
This Dreamy Bake Blueberry Cheesecake is a fantastic base for all sorts of delicious twists! I love how versatile it is, allowing you to tailor it to your preferences or dietary needs. Here are a few variations that I think you’ll enjoy experimenting with.
Gluten-Free Dreamy Bake Blueberry Cheesecake
Making a gluten-free Dreamy Bake Blueberry Cheesecake is super simple! Just swap out the traditional graham crackers for gluten-free graham cracker crumbs or even finely ground almonds or pecans for the crust. The creamy filling remains the same, ensuring everyone can enjoy this delightful dessert.
Dreamy Bake Blueberry Swirl Cheesecake
For a visually stunning effect, try creating a Dreamy Bake Blueberry Swirl Cheesecake. Prepare a simple blueberry puree by blending fresh or frozen blueberries with a touch of sugar. Dollop spoonfuls of this puree onto the cheesecake filling before chilling, then use a skewer or knife to gently swirl it into the cream cheese for a beautiful marbled look.
Dreamy Bake Baked Blueberry Cheesecake
If you prefer a traditional baked cheesecake, you can adapt this recipe! For a Dreamy Bake Baked Blueberry Cheesecake, you’ll need to bake the cheesecake in a water bath at around 325°F (160°C) until the edges are set but the center still has a slight wobble. This method yields a slightly different texture but is equally delicious.
Dreamy Bake Blueberry Cheesecake with Grandma’s Touch
To add a touch of nostalgia, consider giving your Dreamy Bake Blueberry Cheesecake Grandma’s touch. Perhaps add a hint of lemon zest to the crust, or incorporate a tablespoon of sour cream into the filling for extra tanginess, reminiscent of classic, old-fashioned cheesecakes. You could even top it with a sprinkle of cinnamon sugar.

For those who enjoy baking, exploring different types of homemade bread can be a rewarding experience, offering a foundation for many delicious meals and snacks. Similarly, understanding the nuances of various cheesecake recipes can elevate your dessert game.
Print
Dreamy Bake Blueberry Cheesecake: 1 Heavenly Recipe
- Total Time: 4 hours 30 minutes
- Yield: 12 servings 1x
- Diet: Vegetarian
Description
This Dreamy No-Bake Blueberry Cheesecake recipe is an effortless and creamy dessert perfect for any occasion. It features a graham cracker crust, a smooth cream cheese filling, and a vibrant blueberry topping, making it a delightful treat.
Ingredients
- 2 cups graham cracker crumbs
- ½ cup unsalted butter, melted
- 2 tablespoons granulated sugar
- 16 ounces cream cheese, softened
- 1 cup powdered sugar
- 1 teaspoon vanilla extract
- 1 cup heavy whipping cream
- 2 cups fresh blueberries, plus extra for topping
- 1 tablespoon lemon juice
- 1 tablespoon cornstarch (optional for thickening)
Instructions
- Combine graham cracker crumbs, melted butter, and sugar in a bowl. Mix until it resembles wet sand.
- Press the mixture firmly into the bottom of a 9-inch springform pan.
- Chill the crust in the refrigerator while preparing the filling.
- In a large bowl, combine softened cream cheese and powdered sugar. Mix with an electric mixer until smooth.
- Add vanilla extract and mix well.
- Whip heavy cream in another bowl until stiff peaks form. Gently fold it into the cream cheese mixture.
- Gently fold in fresh blueberries and lemon juice. If using cornstarch, mix it in now.
- Pour the filling over the chilled crust and smooth the top with a spatula.
- Cover with plastic wrap and chill for at least 4 to 5 hours, or overnight.
- Prepare the topping by warming some blueberries with a tablespoon of sugar until they burst. Let cool.
- Remove the cheesecake from the springform pan. Top with the cooled blueberry mixture and extra fresh blueberries if desired.
Notes
- For best results, use ripe, fresh blueberries.
- Ensure cream cheese is at room temperature for a smooth filling.
- Adjust powdered sugar to your preference.
- Consider adding fresh mint or basil to the topping for an aromatic twist.
- Layering the blueberry filling within the cheesecake creates an intricate look.
- For a gluten-free crust, use gluten-free graham cracker crumbs or ground nuts.
- Toss blueberries in a little flour before folding to prevent sinking.
- Frozen blueberries can be used if thawed and drained.
- Prep Time: 30 minutes
- Cook Time: 0 minutes
- Category: Dessert
- Method: No-Bake
- Cuisine: American
Nutrition
- Serving Size: 1 slice (1/12 of cheesecake)
- Calories: 250 kcal
- Sugar: 20g
- Sodium: 150mg
- Fat: 15g
- Saturated Fat: 9g
- Unsaturated Fat: 6g
- Trans Fat: 0g
- Carbohydrates: 25g
- Fiber: 1g
- Protein: 3g
- Cholesterol: 45mg

