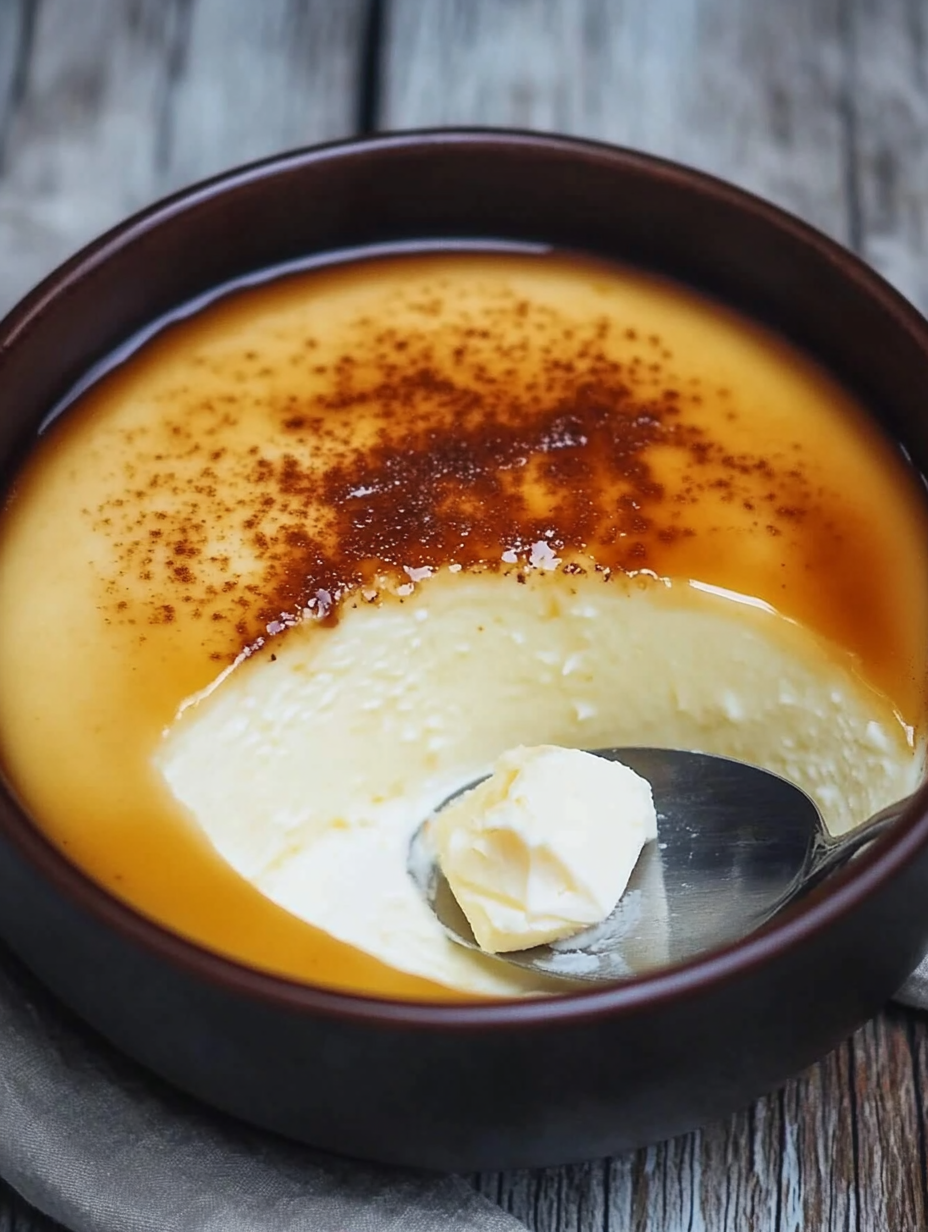
Welcome, dessert lovers! If you’re looking for a sweet treat that’s as dreamy as a cloud and doesn’t require you to preheat the oven, then you’re in for a delightful surprise with this No-Bake Creamy Milk Dessert. It’s the dessert that’s not just delicious but also incredibly easy to whip up—perfect for busy days when you still want to impress without breaking a sweat!
Why You’ll Love This No-Bake Creamy Milk Dessert
Imagine creamy milk, luscious sugar, and a hint of vanilla transforming into a dessert that’s light as air and oh-so-satisfying. This indulgent delight is not just any ordinary dessert; it’s a silky-smooth creation that melts in your mouth and is perfect for any occasion. Whether it’s a cozy family gathering, a casual weekend treat, or an elegant dinner party, this dessert will steal the show! So, let’s dive right into the creamy goodness, shall we?
Ingredients
Here’s what you’ll need to bring this delightful dessert to life:
- 2 cups of milk – Because what’s a creamy dessert without milk?
- 1 cup of sugar – This is where the magic of sweetness happens!
- 1/2 cup of cornstarch – This will give our dessert that wonderful, thick texture.
- 1 teaspoon of vanilla extract – For that oh-so-important flavor boost!
- 1/4 teaspoon of salt – A pinch of salt makes all the flavors pop.
- 1 cup of heavy cream – We’ll be whipping this into fluffy clouds!
- Grated chocolate or fresh fruit for decoration (optional) – Because a little extra flair never hurt anyone!
Steps to Make Your No-Bake Creamy Milk Dessert
- Combine the Goodies: In a saucepan, mix together the milk, sugar, cornstarch, salt, and vanilla extract. It’s like a little party in your pan—except no one’s wearing party hats, just a fun flavor mix!
- Cook It Up: Place your saucepan on medium heat and keep stirring until the mixture thickens. (Don’t walk away; you don’t want your creamy concoction to turn into a thick paste—yikes!)
- Cool Down: Once thickened, remove it from the heat and let it cool for a bit. You’ll want to keep it at a comfortable temperature before the next step—no one likes a super-hot dessert!
- Mold It: Pour your cooled mixture into molds or individual serving cups. This part feels a bit like making magic: it transforms from a liquid to a tantalizing dessert!
- Chill Out: Allow your desserts to cool at room temperature, then pop them in the fridge until they’re firm. This takes a little patience, but trust me, it’s worth the wait.
- Whip It Good: Just before serving, whip the heavy cream until it’s light and fluffy. Top your creamy dessert with this whipped delight. Want to impress even more? Sprinkle some grated chocolate or fresh fruit on top. Voila! Your dessert is dressed for success!
Cooking Tips
- Don’t Panic: If your mixture looks a tad lumpy while cooking, don’t fret! It’ll all come together in the end. Lumps are just a little bit of extra character.
- Flavor Variations: Feeling adventurous? Try adding a hint of almond extract instead of vanilla for an unexpected twist!
A Personal Touch
This No-Bake Creamy Milk Dessert holds a special place in my heart because it became my go-to after a particularly long day at work when my kids were craving something sweet. They loved it so much that it became a staple in our household, and who doesn’t love a dessert that’s both easy to make and kid-approved? It’s like winning the dessert lottery!
FAQs
- Can I substitute the heavy cream? Sure! You can use a lighter whipped topping if desired, but it won’t have the same richness.
- How can I store leftovers? Keep any leftovers in the fridge for up to 3 days. Just make sure they’re covered to maintain that creamy goodness!
Desserts don’t have to be complicated to be amazing. With this No-Bake Creamy Milk Dessert, you can impress your friends and family with a treat that’s both elegant and simple to prepare. So, the next time you’re looking for a sweet solution for a busy weeknight or a special dinner party, remember this gem!
Grab your apron and let’s create some joy in the kitchen together! If you love this recipe, be sure to check out my other delightful desserts like the Classic Chocolate Mousse or the Berry Bliss Parfait—you won’t regret it!
Now, who’s ready to dive into some creamy, dreamy goodness? 🍮💕
Check out more delightful recipes here!.
External Resources: For more ideas on making your own heavy cream, check out this guide on how to whip heavy cream. Enjoy!
Print
No-Bake Creamy Milk Delight – A Luxurious Treat!
Description
Welcome, dessert lovers! If you’re looking for a sweet treat that’s as dreamy as a cloud and doesn’t require you to preheat the oven, then you’re in for a delightful surprise with this No-Bake Creamy Milk Dessert. It’s the dessert that’s not just delicious but also incredibly easy to whip up—perfect for busy days when you still want to impress without breaking a sweat!
Ingredients
- 2 cups of milk – Because what’s a creamy dessert without milk?
- 1 cup of sugar – This is where the magic of sweetness happens!
- 1/2 cup of cornstarch – This will give our dessert that wonderful, thick texture.
- 1 teaspoon of vanilla extract – For that oh-so-important flavor boost!
- 1/4 teaspoon of salt – A pinch of salt makes all the flavors pop.
- 1 cup of heavy cream – We’ll be whipping this into fluffy clouds!
- Grated chocolate or fresh fruit for decoration (optional) – Because a little extra flair never hurt anyone!
Instructions
- Combine the Goodies: In a saucepan, mix together the milk, sugar, cornstarch, salt, and vanilla extract. It’s like a little party in your pan—except no one’s wearing party hats, just a fun flavor mix!
- Cook It Up: Place your saucepan on medium heat and keep stirring until the mixture thickens. (Don’t walk away; you don’t want your creamy concoction to turn into a thick paste—yikes!)
- Cool Down: Once thickened, remove it from the heat and let it cool for a bit. You’ll want to keep it at a comfortable temperature before the next step—no one likes a super-hot dessert!
- Mold It: Pour your cooled mixture into molds or individual serving cups. This part feels a bit like making magic: it transforms from a liquid to a tantalizing dessert!
- Chill Out: Allow your desserts to cool at room temperature, then pop them in the fridge until they’re firm. This takes a little patience, but trust me, it’s worth the wait.
- Whip It Good: Just before serving, whip the heavy cream until it’s light and fluffy. Top your creamy dessert with this whipped delight. Want to impress even more? Sprinkle some grated chocolate or fresh fruit on top. Voila! Your dessert is dressed for success!
Notes
- Don’t Panic: If your mixture looks a tad lumpy while cooking, don’t fret! It’ll all come together in the end. Lumps are just a little bit of extra character.
- Flavor Variations: Feeling adventurous? Try adding a hint of almond extract instead of vanilla for an unexpected twist!
