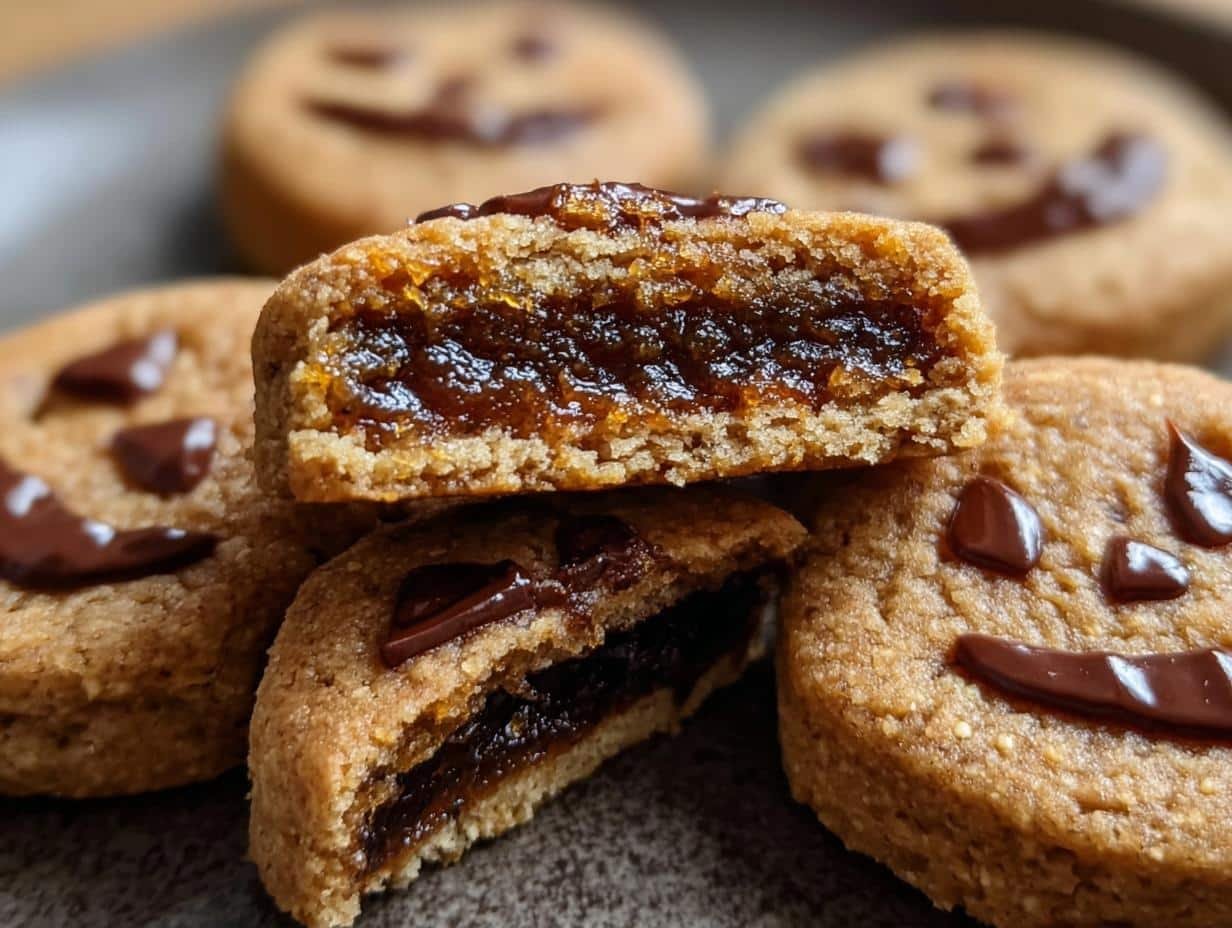
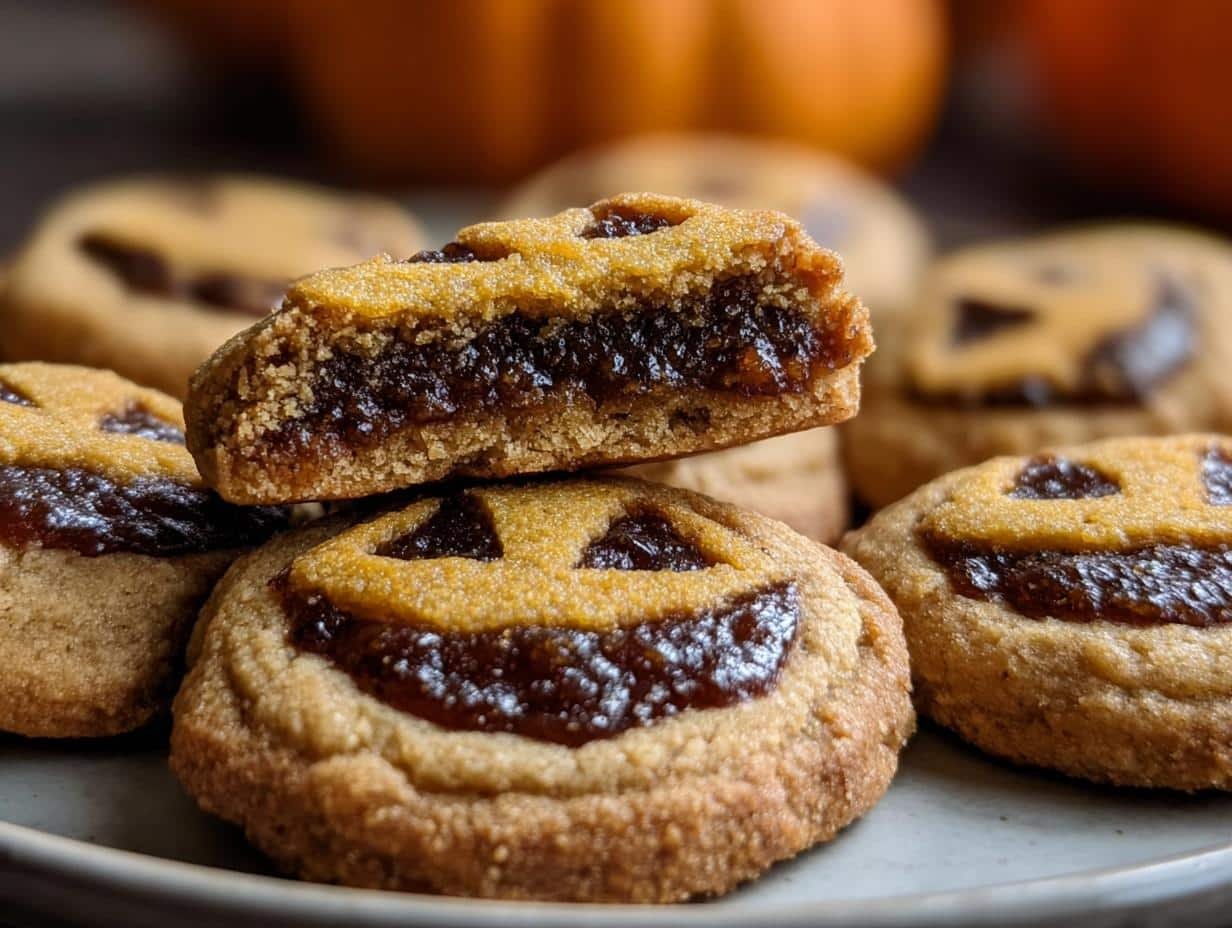
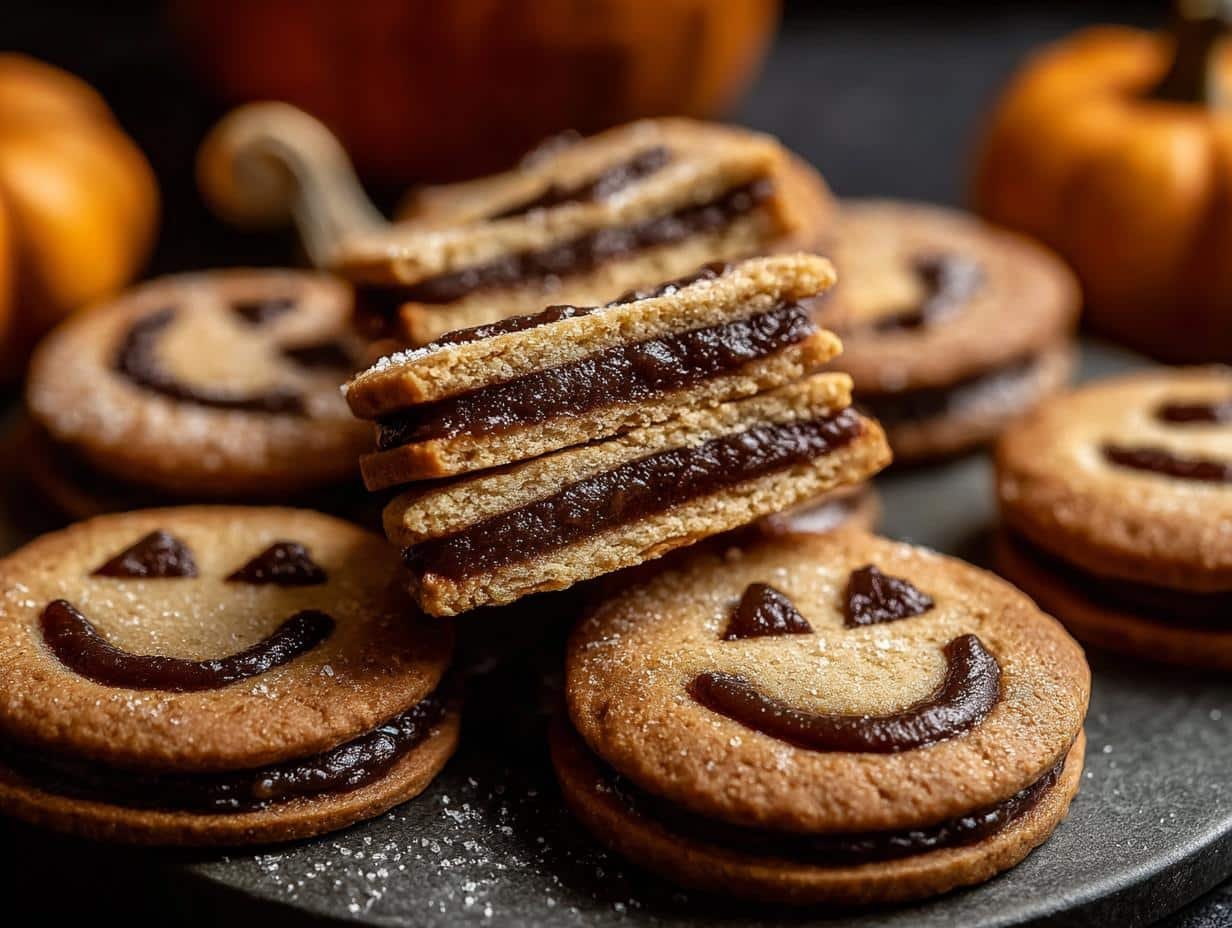
Halloween Date Filled Cookies have been a cherished part of my autumn traditions for as long as I can remember. The scent of warm spices and sweet dates wafting from the kitchen signals the start of the spooky season, and these cookies are always the first treat I bake. There’s something magical about biting into a soft, chewy cookie only to discover a gooey, caramel-like date center. They’re not just desserts; they’re little edible decorations that bring smiles and a touch of Halloween spirit to any gathering. If you’re looking for a truly delightful and festive bake, these spooky date filled cookies are an absolute must-try. Let’s get baking!
Why You’ll Love These Halloween Date Filled Cookies
These aren’t just any cookies; they’re a delightful fall treat packed with flavor and fun. You’ll adore them because:
- They offer a perfect balance of soft, chewy cookie and a sweet, gooey date center.
- The natural sweetness from the dates makes them a wonderful option if you’re looking for slightly more healthy Halloween date cookies.
- They are incredibly versatile, allowing for creative Halloween shapes and decorations.
- This recipe is designed to be straightforward, making them wonderfully easy Halloween date cookies to whip up, even for beginner bakers.
- The cozy, spiced flavors are perfect for autumnal gatherings and festive celebrations.
- They’re a fantastic way to use up dates and create a truly homemade feel for your Halloween spread.
- The satisfying texture and rich flavor make them a crowd-pleaser for all ages.
Ingredients for Halloween Date Filled Cookies
Gathering these simple ingredients is the first step to creating some of the best date filled cookies Halloween has to offer. The cookie dough comes together with pantry staples, while the date filling uses the natural sweetness of dates. I find using good quality dates really makes a difference in the final flavor.
- 1 cup shortening – provides a tender crumb
- 1/2 cup granulated sugar – for sweetness
- 1/2 cup brown sugar – adds moisture and a caramel note
- 1 egg – acts as a binder
- 3 tablespoons milk – helps create a soft dough
- 1 teaspoon vanilla extract – enhances flavor
- 3 cups sifted all-purpose flour – the base of our cookie
- 1/2 teaspoon salt – balances the sweetness
- 1/2 teaspoon baking soda – helps cookies spread and brown
- 2 cups chopped dates – the star of our gooey filling
- 1/2 cup sugar – to sweeten the date filling
- 1/2 cup water – to help cook down the dates
- 2 tablespoons lemon juice – brightens the filling flavor
- 1/4 teaspoon salt – to enhance the date flavor
How to Make Halloween Date Filled Cookies
Let’s dive into creating these delightful homemade Halloween date cookies! This recipe is straightforward, and the results are absolutely worth it. I love the process of making these, from the creamy dough to the sweet date filling. You’ll be amazed at how easy it is to make these spooky date filled cookies from scratch.
Preparing the Cookie Dough
First, we cream together the shortening and both sugars until they’re nice and fluffy. Then, I add the egg, milk, and vanilla extract, mixing until everything is well combined. In a separate bowl, sift together the flour, baking soda, and salt before gradually adding them to the wet ingredients. Mix until a smooth dough forms. For easier handling, I always recommend chilling this dough for at least an hour.
Making the Sweet Date Filling
While the dough chills, let’s make the star of our cookies: the date filling. In a saucepan, combine the chopped dates, sugar, and water. Bring this mixture to a boil, then reduce the heat, cover, and let it simmer gently for about 5 minutes, stirring now and then. Stir in the lemon juice and salt. It’s important to let this date filling cool completely before you start assembling the cookies.
Assembling Your Spooky Cookies
Now for the fun part – assembling your homemade Halloween date cookies! On a lightly floured surface, roll out half of the chilled dough to a thinness of just under 1/8 inch. Use your favorite Halloween cookie cutters, like pumpkins or bats, to cut out shapes. Place a tablespoon of the cooled date filling onto the center of each bottom cookie. Then, top with another cookie shape and press the edges firmly with a fork to seal them securely. Arranging these on an ungreased baking sheet is the final step before baking.
- Step 1: Preheat your oven to 375°F (190°C).
- Step 2: Cream together the shortening and both sugars until fluffy. Add the egg, milk, and vanilla, mixing well.
- Step 3: Sift the flour, baking soda, and salt. Add these dry ingredients to the wet mixture. Blend until smooth.
- Step 4: Chill the dough for at least one hour for easier rolling.
- Step 5: In a saucepan, combine the chopped dates, sugar, and water. Bring to a boil, then cover and simmer for 5 minutes, stirring occasionally.
- Step 6: Stir in the lemon juice and salt. Let the date filling mixture cool before using.
- Step 7: On a lightly floured surface, roll out half the dough to just under 1/8 inch thick. Use a 2 1/2-inch round cookie cutter to cut shapes. For a spooky Halloween touch, use pumpkin, bat, or ghost cutters.
- Step 8: Place one tablespoon of the prepared date filling in the center of each base cookie.
- Step 9: Top with another cookie round. Press the edges with a fork to seal them.
- Step 10: Arrange the assembled Halloween date filled cookies on an ungreased baking sheet.
- Step 11: Bake for 10–12 minutes, or until lightly golden.
- Step 12: Cool the cookies completely before serving.
Pro Tips for the Best Halloween Date Filled Cookies
Want to make your Halloween cookies truly unforgettable? I’ve picked up a few tricks over the years that guarantee success. These tips will help you achieve that perfect chewy texture and gooey center, making your homemade Halloween date cookies the star of any party.
- Always ensure your cookie dough is well-chilled before rolling; this prevents sticking and makes shaping so much easier.
- Don’t overfill the cookies! A tablespoon of date filling is usually perfect; too much can cause the cookies to leak during baking.
- For extra spooky flair, consider cutting out small shapes from the top cookie layer, like eyes for bats or a small jack-o’-lantern face.
- Using parchment paper on your baking sheets not only prevents sticking but also makes cleanup a breeze.
What’s the secret to perfect date filling?
The key to a perfect date filling is to simmer them gently with water and sugar until they break down into a thick, spreadable paste. A little lemon juice brightens the flavor, and ensuring it cools completely prevents the dough from melting before baking. This simple technique is part of the best date filled cookie recipe Halloween has to offer. For more information on the benefits of dates, you can check out this Healthline article.
Can I make Halloween date filled cookies ahead of time?
Absolutely! You can prepare the cookie dough and the date filling up to 2 days in advance and store them separately in the refrigerator. Assemble the cookies just before baking for the freshest results, or assemble them and freeze them unbaked for up to a month. If you’re looking for other make-ahead dessert ideas, consider these chocolate chip cookies.
How do I avoid common mistakes with Halloween date filled cookies?
The most common pitfall is overfilling the cookies, which leads to the filling oozing out. Make sure to use just one tablespoon of filling per cookie. Another mistake is not chilling the dough enough, making it sticky and hard to roll. Ensure the dough is firm before you start cutting your shapes.
Creative Ways to Serve Halloween Date Filled Cookies
These festive cookies are more than just a treat; they’re a centerpiece for your Halloween spread! Imagine presenting a platter of these spooky cookies alongside a warm mug of apple cider or a creamy pumpkin spice latte. They make a wonderfully sweet addition to any Halloween dessert date cookies selection, especially when paired with other fall-themed treats like spiced nuts or caramel apples. For a fun party activity, set up a cookie decorating station with edible markers, spooky sprinkles, and a little melted dark chocolate for drizzling. You might also enjoy these blueberry cream cheese crumb cake delights for a different kind of festive treat.

Nutrition Facts for Halloween Date Filled Cookies
Here’s a breakdown of the estimated nutritional information for these delightful Halloween treats. These numbers provide a good idea of what you’re enjoying with each cookie.
- Serving Size: 1 cookie
- Calories: 170
- Fat: 5g
- Saturated Fat: 2g
- Protein: 1g
- Carbohydrates: 28g
- Fiber: 1g
- Sugar: 12g
- Sodium: 50mg
Nutritional values are estimates and may vary based on specific ingredients and portion sizes used.
How to Store and Reheat Halloween Date Filled Cookies
Properly storing your delicious Halloween date filled cookies ensures they stay fresh and tasty long after baking. Once completely cooled, store them in an airtight container at room temperature for up to 3-4 days. If you have a lot of these delightful treats, or want to save some for later, they freeze beautifully! Place them in a freezer-safe container or a heavy-duty zip-top bag, separating layers with parchment paper, and they’ll keep for up to 3 months. This makes them a perfect make-ahead option for any Halloween party or craving. For more freezing tips, check out this guide on food storage.
When you’re ready to enjoy your frozen cookies, simply transfer them from the freezer to the refrigerator overnight to thaw. For a warm, freshly baked experience, you can reheat them gently. Place a cookie on a microwave-safe plate and heat for about 10-15 seconds, or until just warmed through. Alternatively, pop them in a 300°F (150°C) oven for a few minutes until slightly warm. This reheating method is fantastic for bringing back that soft, chewy texture and gooey date filling, making them taste almost as good as when they were first baked.
Frequently Asked Questions About Halloween Date Filled Cookies
What are Halloween date filled cookies?
Halloween date filled cookies are a delightful seasonal treat made from a soft, chewy cookie dough that encases a sweet, gooey filling crafted from cooked dates. They’re often shaped and decorated with Halloween themes, making them a festive and delicious part of fall celebrations. The natural sweetness and caramel-like texture of the dates make them a popular choice for a homemade Halloween dessert.
Why use dates in Halloween cookies?
Dates are fantastic for Halloween cookies because they offer a wonderful natural sweetness and a rich, caramel-like flavor without relying solely on refined sugar. Their sticky texture helps bind them into a perfect, gooey filling that doesn’t dry out easily, and they also add a bit of fiber and nutrients, making them a slightly more wholesome option compared to some other cookie fillings. This makes them a great choice for those looking for healthier Halloween treats.
Can I use other types of dried fruit for the filling?
While dates are traditional and provide a unique caramel flavor and texture, you can experiment with other dried fruits! Prunes or figs would also work well, offering a similar soft, spreadable texture when cooked down. You might need to adjust the sugar and water slightly based on the sweetness and moisture content of the fruit you choose. However, for the classic taste of these Halloween stuffed cookies, dates are definitely the way to go. If you’re interested in other fruit-based recipes, consider these watermelon rind candy.
How do I make these cookies vegan or gluten-free?
To make vegan Halloween date filled cookies, simply substitute the egg with a flax egg (1 tablespoon flaxseed meal mixed with 3 tablespoons water, let sit for 5 minutes) and use a plant-based milk like almond or soy milk. For gluten-free Halloween date cookies, replace the all-purpose flour with a good quality gluten-free all-purpose flour blend that contains xanthan gum. Ensure your shortening is also vegan if needed. Baking times might vary slightly, so keep an eye on them! For more gluten-free baking ideas, check out King Arthur Baking’s gluten-free recipes.
Variations of Halloween Date Filled Cookies You Can Try
Feeling adventurous? These cookies are wonderfully adaptable! You can easily tweak the recipe to suit different dietary needs or explore new flavor profiles. For those seeking vegan Halloween date filled cookies, swap the egg for a flax egg and use your favorite plant-based milk. If you need gluten-free Halloween date cookies, a good quality gluten-free flour blend will work beautifully in place of the all-purpose flour. And for a quicker treat, you could even adapt this into a no-bake Halloween date cookies variation by crushing cookies and mixing them with the date filling for a no-bake bar or ball. You can also add a pinch of cinnamon or nutmeg to the dough for an extra autumnal spice kick! If you enjoy no-bake options, you might like these no-bake Greek yogurt jello cheesecake.
Print
Halloween Date Filled Cookies: Spooky & Sweet Treats
- Total Time: 1 hour 12 minutes
- Yield: 24 cookies 1x
- Diet: Vegetarian
Description
Soft and chewy Halloween Date Filled Cookies with a sweet, gooey date center, perfect for fall baking and festive parties.
Ingredients
- Cookie Dough:
- 1 cup shortening
- 1/2 cup granulated sugar
- 1/2 cup brown sugar
- 1 egg
- 3 tablespoons milk
- 1 teaspoon vanilla extract
- 3 cups sifted all-purpose flour
- 1/2 teaspoon salt
- 1/2 teaspoon baking soda
- Date Filling:
- 2 cups chopped dates
- 1/2 cup sugar
- 1/2 cup water
- 2 tablespoons lemon juice
- 1/4 teaspoon salt
Instructions
- Preheat your oven to 375°F (190°C).
- Cream together the shortening and both sugars until fluffy. Add the egg, milk, and vanilla, mixing well.
- Sift the flour, baking soda, and salt. Add these dry ingredients to the wet mixture. Blend until smooth.
- Chill the dough for at least one hour for easier rolling.
- In a saucepan, combine the chopped dates, sugar, and water. Bring to a boil, then cover and simmer for 5 minutes, stirring occasionally.
- Stir in the lemon juice and salt. Let the date filling mixture cool before using.
- On a lightly floured surface, roll out half the dough to just under 1/8 inch thick. Use a 2 1/2-inch round cookie cutter to cut shapes. For a spooky Halloween touch, use pumpkin, bat, or ghost cutters.
- Place one tablespoon of the prepared date filling in the center of each base cookie.
- Top with another cookie round. Press the edges with a fork to seal them.
- Arrange the assembled Halloween date filled cookies on an ungreased baking sheet.
- Bake for 10–12 minutes, or until lightly golden.
- Cool the cookies completely before serving.
Notes
- Chill the dough thoroughly for easier rolling and to prevent sticking.
- Do not overfill the cookies; 1 tablespoon of date filling per cookie is ideal to prevent leakage.
- Use fun Halloween-shaped cutters for a festive appearance.
- Consider cutting small shapes like eyes or a jack-o’-lantern smile into the top cookie layer for a spooky effect.
- Using parchment paper can make cleanup easier.
- For an oatmeal version, add 1 cup of rolled oats to the dough.
- For a nutty twist, mix chopped walnuts or pecans into the date filling.
- Drizzle melted dark chocolate over cooled cookies for an indulgent touch.
- Prep Time: 20 minutes
- Cook Time: 12 minutes
- Category: Dessert
- Method: Baking
- Cuisine: American
Nutrition
- Serving Size: 1 cookie
- Calories: 170
- Sugar: 12g
- Sodium: 50mg
- Fat: 5g
- Saturated Fat: 2g
- Unsaturated Fat: 2g
- Trans Fat: 0g
- Carbohydrates: 28g
- Fiber: 1g
- Protein: 1g
- Cholesterol: 10mg

