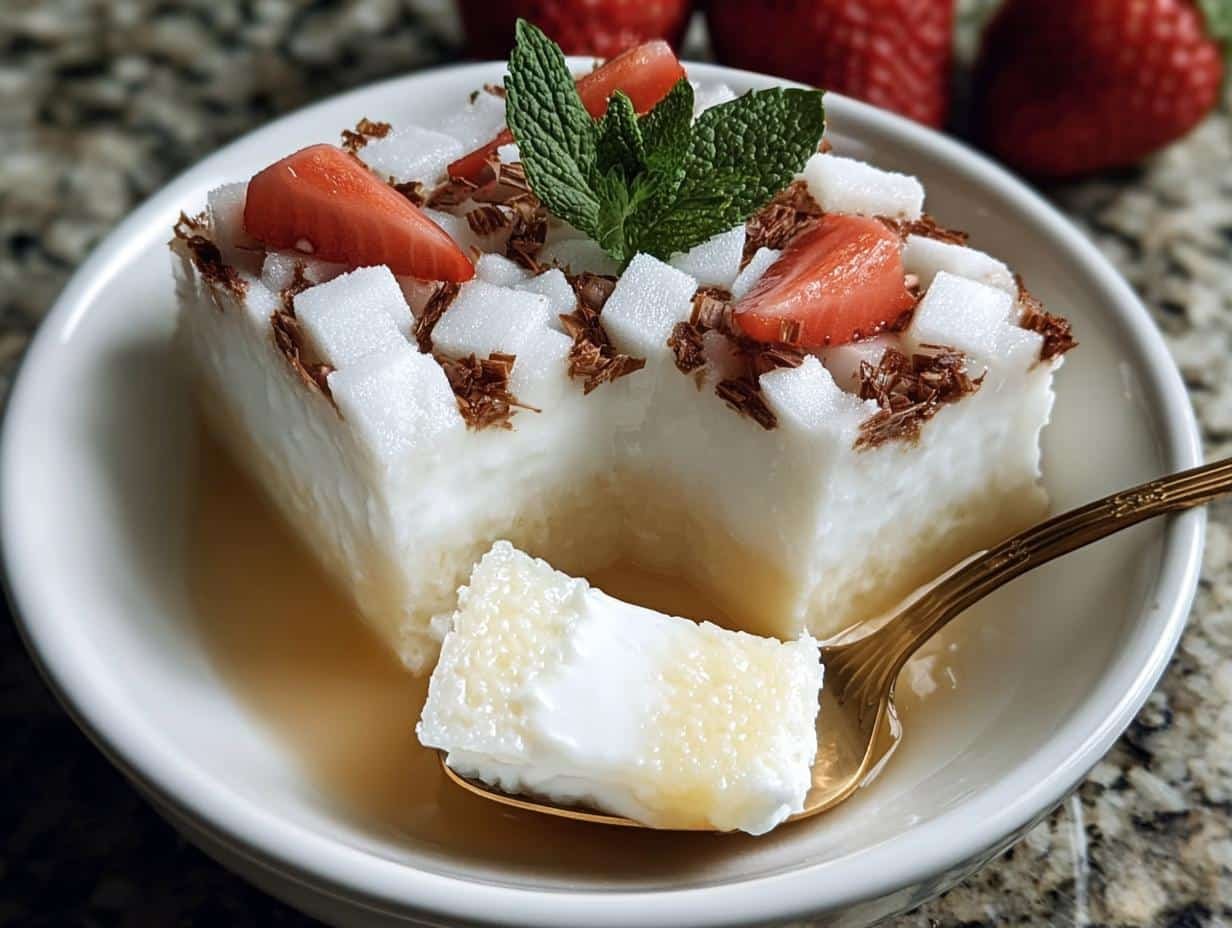
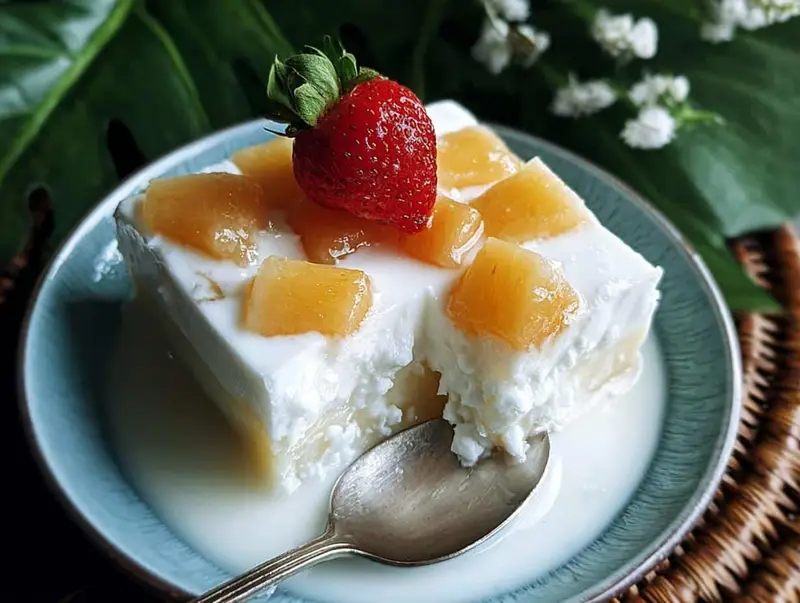
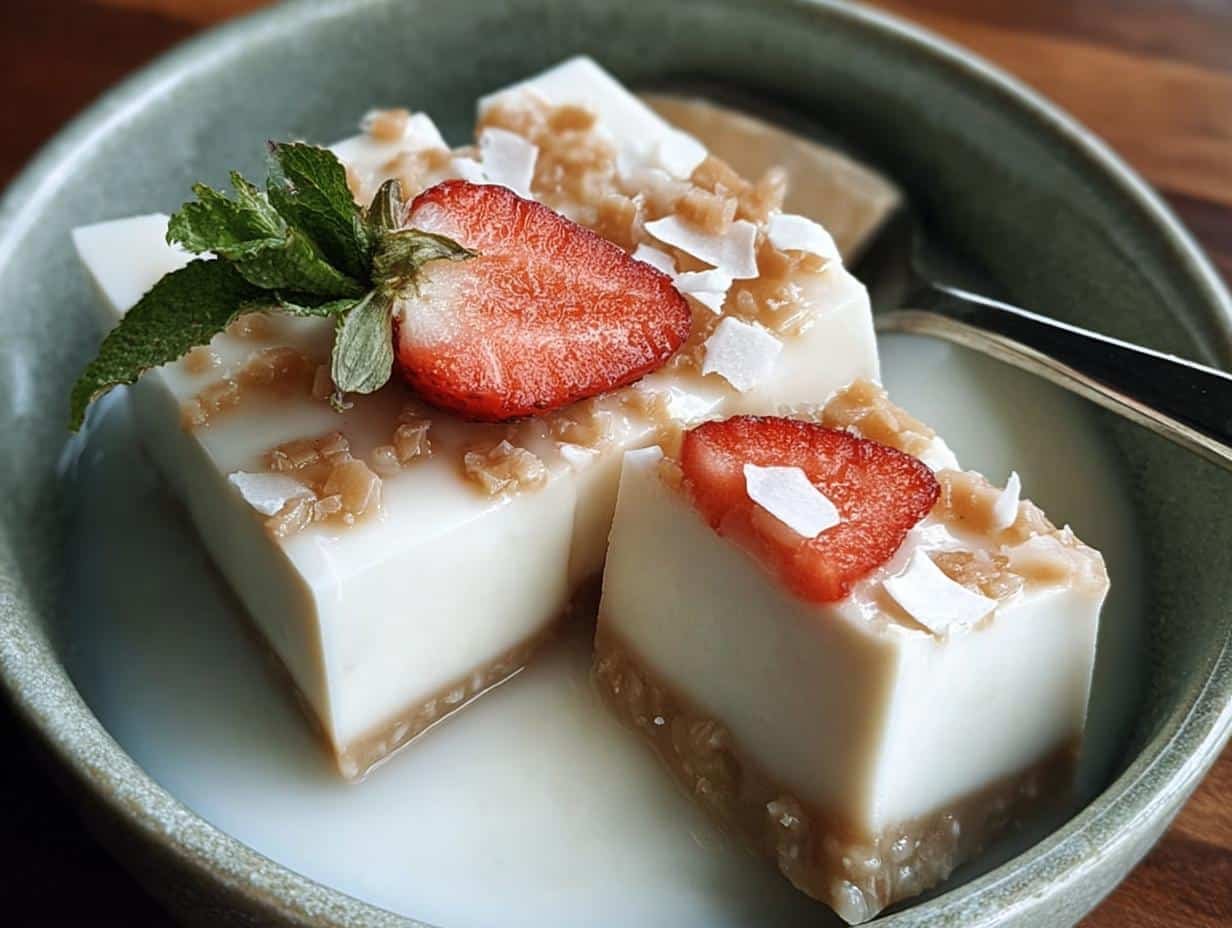
Haupia Hawaiian Coconut Pudding has been a taste of paradise for me since my first trip to the islands. I remember walking through a bustling farmer’s market, the air thick with the sweet scent of tropical flowers, and spotting these beautiful, jiggly squares. One bite, and I was hooked! It’s a simple, yet incredibly satisfying dessert that tastes like sunshine and ocean breezes. This Haupia recipe is so straightforward, making it the perfect choice for anyone looking for an authentic yet easy Hawaiian coconut dessert. It’s pure creamy bliss in every spoonful. Let’s get cooking!
What is Haupia?
So, what is haupia? It’s a beloved Hawaiian dessert, a creamy, delightful pudding that’s a staple at luaus and family gatherings. This treat has roots in Polynesian culture, originally made with coconut cream and arrowroot. Today, a traditional haupia recipe typically uses just a few simple ingredients for its signature texture and taste.
- Originates from Hawaii, with Polynesian influences.
- Often served at celebrations and potlucks.
- Features a smooth, slightly firm, jelly-like texture.
- Boasts a delicate, sweet coconut flavor.
- Key ingredients include coconut milk, sugar, and a thickener like cornstarch or arrowroot.
- It’s a refreshingly light dessert, perfect for warm weather.
- A true taste of island comfort food.
Why You’ll Love This Haupia Hawaiian Coconut Pudding
This recipe is a winner for so many reasons! It’s a delightful taste of the islands that’s incredibly easy to whip up:
- Incredible Flavor: You’ll adore the rich, tropical coconut taste that transports you straight to Hawaii.
- Super Quick Prep: With minimal effort, this easy haupia recipe comes together in under 30 minutes.
- Budget-Friendly Bliss: Made with just a few pantry staples, it’s an affordable way to enjoy a gourmet dessert.
- Family Favorite: Kids and adults alike will devour this smooth, creamy treat.
- Dietary Friendly: Naturally dairy-free haupia, it’s perfect for those avoiding dairy.
- Healthy-ish Treat: It’s a lighter dessert option compared to many richer puddings.
- Versatile Dessert: Perfect for potlucks, parties, or just a sweet afternoon snack.
Ingredients for Haupia Recipe
This simple Haupia coconut milk pudding comes together with just a few pantry staples. I love how minimal the ingredient list is for such a delicious result! Here’s what you’ll need:
- 1 can (13.5 ounces) full-fat coconut milk – This is the star, providing that rich, creamy base and tropical flavor essential for authentic haupia.
- 1/2 cup cornstarch – Our thickener! It gives the pudding that signature smooth, slightly firm, jelly-like texture.
- 1/2 cup granulated sugar – Just enough to sweeten the coconut milk without overpowering it.
- 1 cup water – Used to create a slurry with the cornstarch, ensuring a smooth pudding without lumps.
- Optional: Agar-agar – If you prefer a firmer, more gelatinous texture, you can substitute agar-agar for cornstarch.
- Optional: Layering ingredients – Think chocolate or fruit purees for creative variations!
How to Make Haupia
Ready to learn how to make haupia? It’s surprisingly simple and incredibly rewarding! This method ensures you get that perfect, smooth texture every time. Trust me, making this authentic haupia pudding at home is easier than you think.
- Step 1: Prepare your pan. Lightly grease an 8×8 inch baking pan with non-stick spray or a neutral oil. You can also line it with parchment paper for easier removal later.
- Step 2: Make the cornstarch slurry. In a small bowl, whisk together the 1 cup water and 1/2 cup cornstarch until the cornstarch is completely dissolved and there are no lumps. Set this aside.
- Step 3: Heat the coconut milk and sugar. Pour the 1 can (13.5 oz) full-fat coconut milk into a medium saucepan. Add the 1/2 cup sugar. Heat over medium heat, whisking constantly, until the mixture is hot and just begins to gently bubble around the edges, about 3-5 minutes. Don’t let it boil vigorously.
- Step 4: Thicken the pudding. Slowly drizzle the cornstarch slurry into the hot coconut milk mixture while whisking continuously. This is crucial to prevent lumps.
- Step 5: Cook until thick. Continue to cook over low heat, whisking frequently, for about 10-15 minutes. You’ll feel the mixture thicken as you stir. It’s ready when it pulls away cleanly from the sides of the pan and has a pudding-like consistency. The aroma will be wonderfully coconutty!
- Step 6: Pour and cool. Pour the thickened haupia mixture into your prepared pan. Let it sit at room temperature for about 15 minutes to cool slightly.
- Step 7: Chill until set. Cover the pan loosely with plastic wrap and refrigerate for 1-2 hours, or until the haupia is firm and set. It should have a texture similar to a firm custard or a soft jelly.
- Step 8: Serve and enjoy! Once set, cut the haupia into squares. You’ve now successfully made this delightful Hawaiian dessert!
Pro Tips for the Best Haupia Hawaiian Coconut Pudding
I’ve made this dessert countless times, and a few tricks really elevate it. Follow these tips to ensure your pudding is perfect every time!
- Use Full-Fat Coconut Milk: This is non-negotiable for that rich, creamy texture and authentic flavor. Light coconut milk won’t give you the same results.
- Whisk Constantly: When adding the cornstarch slurry, continuous whisking is key to preventing lumps and ensuring a silky-smooth consistency.
- Don’t Overcook: Once it thickens and pulls away from the sides, it’s done. Overcooking can make it tough.
- Proper Cooling is Key: Let it cool slightly at room temperature before refrigerating. This helps it set evenly and prevents condensation.
What’s the secret to perfect Haupia?
The secret to a truly perfect Haupia Hawaiian Coconut Pudding lies in using full-fat coconut milk and whisking diligently as it thickens. This ensures that signature creamy, melt-in-your-mouth texture that makes this the best haupia recipe.
Can I make Haupia ahead of time?
Absolutely! This dessert is actually best made ahead. You can prepare it up to 24 hours in advance. Just cover it once it’s set and keep it chilled in the refrigerator until you’re ready to serve.
How do I avoid common mistakes with Haupia?
The most common pitfalls are lumps and a watery texture. Always whisk the cornstarch and water until completely dissolved before adding it to the hot coconut milk. Also, ensure you cook it long enough until it thickens properly before chilling.
Best Ways to Serve Haupia
Serving this delightful Haupia Hawaiian Coconut Pudding is almost as fun as making it! Its simple, tropical flavor makes it incredibly versatile. Here are a few ways I love to present this classic Hawaiian coconut dessert:
- Classic Squares: The most traditional way is to simply cut the set pudding into bite-sized squares. They look beautiful on a platter for parties or as a simple after-dinner treat.
- With Tropical Fruit: Pair the creamy haupia with fresh, vibrant tropical fruits like pineapple chunks, mango slices, or passion fruit pulp. The tartness of the fruit beautifully balances the sweet coconut.
- As a Layer: Get creative by layering haupia with a rich chocolate ganache or a swirl of fruit puree. This adds visual appeal and another dimension of flavor.
No matter how you serve it, this pudding is sure to be a hit!

Nutrition Facts for Haupia
Let’s take a look at the nutritional breakdown for this delightful Haupia Hawaiian Coconut Pudding. It’s a relatively light dessert, making it a guilt-free treat!
- Serving Size: 1 square
- Calories: 130 kcal
- Fat: 4 g
- Saturated Fat: 3 g
- Unsaturated Fat: 1 g
- Trans Fat: 0 g
- Protein: 1 g
- Carbohydrates: 25 g
- Fiber: 0 g
- Sugar: 12 g
- Sodium: 5 mg
- Cholesterol: 0 mg
Nutritional values are estimates and may vary based on specific ingredients used in your haupia recipe.
How to Store and Reheat Haupia
Properly storing your delicious Haupia Hawaiian Coconut Pudding is key to enjoying it for days to come. Once it’s fully set and you’re ready to tuck it away, make sure it has cooled completely at room temperature. This prevents condensation, which can make the pudding watery. Then, transfer it to an airtight container. I’ve found that glass containers work best for this haupia dessert recipe as they don’t absorb odors.
You can confidently store your haupia in the refrigerator for up to 3 to 4 days. It maintains its lovely texture and flavor during this time. If you need to store it for longer, freezing is an option! Wrap individual squares tightly in plastic wrap, then place them in a freezer-safe bag or container. Haupia can be frozen for up to 3 months. To reheat, simply thaw the frozen squares overnight in the refrigerator. You can enjoy it chilled straight from the fridge, or for a slightly softer texture, let it sit at room temperature for about 15-20 minutes before serving.
Frequently Asked Questions About Haupia
Why is Haupia so popular?
Haupia Hawaiian Coconut Pudding is incredibly popular because it’s a taste of pure tropical bliss! It’s simple, refreshing, and has a unique, creamy texture that’s unlike other desserts. Its popularity stems from its roots in Hawaiian culture, where it’s a traditional treat served at celebrations and gatherings, embodying the spirit of Aloha. It’s a comforting yet light dessert that appeals to everyone.
Can I make Haupia with different types of milk?
While full-fat coconut milk is essential for the authentic flavor and creamy texture of Haupia Hawaiian Coconut Pudding, some people experiment. Using almond milk or soy milk will change the flavor and texture significantly, making it less traditional. For a vegan version, sticking with full-fat coconut milk is best, as it provides the necessary richness and body.
What makes Haupia different from other coconut desserts?
What sets haupia apart is its distinct texture – it’s firmer than a typical pudding but softer than jelly, often described as a firm custard. Many other Hawaiian dessert recipes might use cream or eggs, but this Haupia recipe relies primarily on coconut milk and a thickener, giving it a unique, clean coconut flavor. It’s less decadent than a rich chocolate cake but more satisfying than a simple fruit salad.
Is Haupia considered a healthy dessert?
Compared to many rich, creamy desserts, Haupia Hawaiian Coconut Pudding is relatively light. It’s naturally dairy-free and cholesterol-free. While it does contain sugar and fat from the coconut milk, a serving is generally lower in calories and fat than many traditional puddings or cakes. It’s a wonderful option for those seeking delicious yet less indulgent treats among Hawaiian dessert recipes.
Variations of Haupia You Can Try
While the classic Haupia Hawaiian Coconut Pudding is divine on its own, I love experimenting with different twists! Here are a few ways to jazz up this simple dessert:
- Vegan Haupia Recipe: This recipe is already naturally vegan if you use cornstarch or agar-agar as your thickener, making it a fantastic vegan haupia recipe. Just ensure your optional additions, like chocolate layers, are also vegan.
- Chocolate Haupia: For a decadent twist, stir in some unsweetened cocoa powder or melted dark chocolate into the mixture just before pouring it into the pan. It transforms into a rich, chocolatey coconut delight.
- Fruity Swirls: After pouring the haupia mixture into the pan, swirl in some fruit purees like passion fruit, mango, or strawberry. This adds a beautiful visual appeal and a burst of fruity flavor to your Hawaiian coconut jelly.
- Layered Delight: Try layering your haupia with another favorite dessert! A layer of chocolate ganache or even a crushed cookie crust can add wonderful texture and flavor contrast.
These variations make your Haupia recipe even more exciting!
Print
Haupia Hawaiian Coconut Pudding: Easy 1 Step Recipe
- Total Time: 40 minutes
- Yield: 8 squares 1x
- Diet: Vegan
Description
Delight in the creamy texture and tropical flavor of haupia, a four-ingredient Hawaiian coconut pudding. This simple dessert is a taste of island bliss, perfect for any occasion.
Ingredients
- 1 can full-fat coconut milk
- 1/2 cup cornstarch
- 1/2 cup sugar
- 1 cup water
- Optional: Agar-agar, layering ingredients (chocolate, fruit)
Instructions
- In a small bowl, mix cornstarch and water until fully dissolved. Set aside.
- Heat coconut milk and sugar in a saucepan over medium heat, whisking constantly until it gently boils (about 3-5 minutes).
- Slowly incorporate the cornstarch-water mixture into the warm coconut milk while whisking continuously.
- Reduce heat to low and cook for 10-15 minutes, whisking frequently, until the mixture pulls away from the sides of the pan.
- Pour the mixture into a greased or lined 8×8 pan.
- Let it cool for 15 minutes at room temperature, then refrigerate for 1-2 hours until set.
- Cut into squares and serve.
Notes
- Garnish with shredded coconut or fresh tropical fruits for extra flavor.
- Store in an airtight container in the refrigerator for up to 2-3 days.
- For a lighter texture, substitute cornstarch with agar-agar.
- Can be layered with chocolate ganache or swirled with fruit purees.
- Prep Time: 10 minutes
- Cook Time: 15 minutes
- Category: Desserts
- Method: Stovetop
- Cuisine: Hawaiian
Nutrition
- Serving Size: 1 square
- Calories: 130 kcal
- Sugar: 12 g
- Sodium: 5 mg
- Fat: 4 g
- Saturated Fat: 3 g
- Unsaturated Fat: 1 g
- Trans Fat: 0 g
- Carbohydrates: 25 g
- Fiber: 0 g
- Protein: 1 g
- Cholesterol: 0 mg

