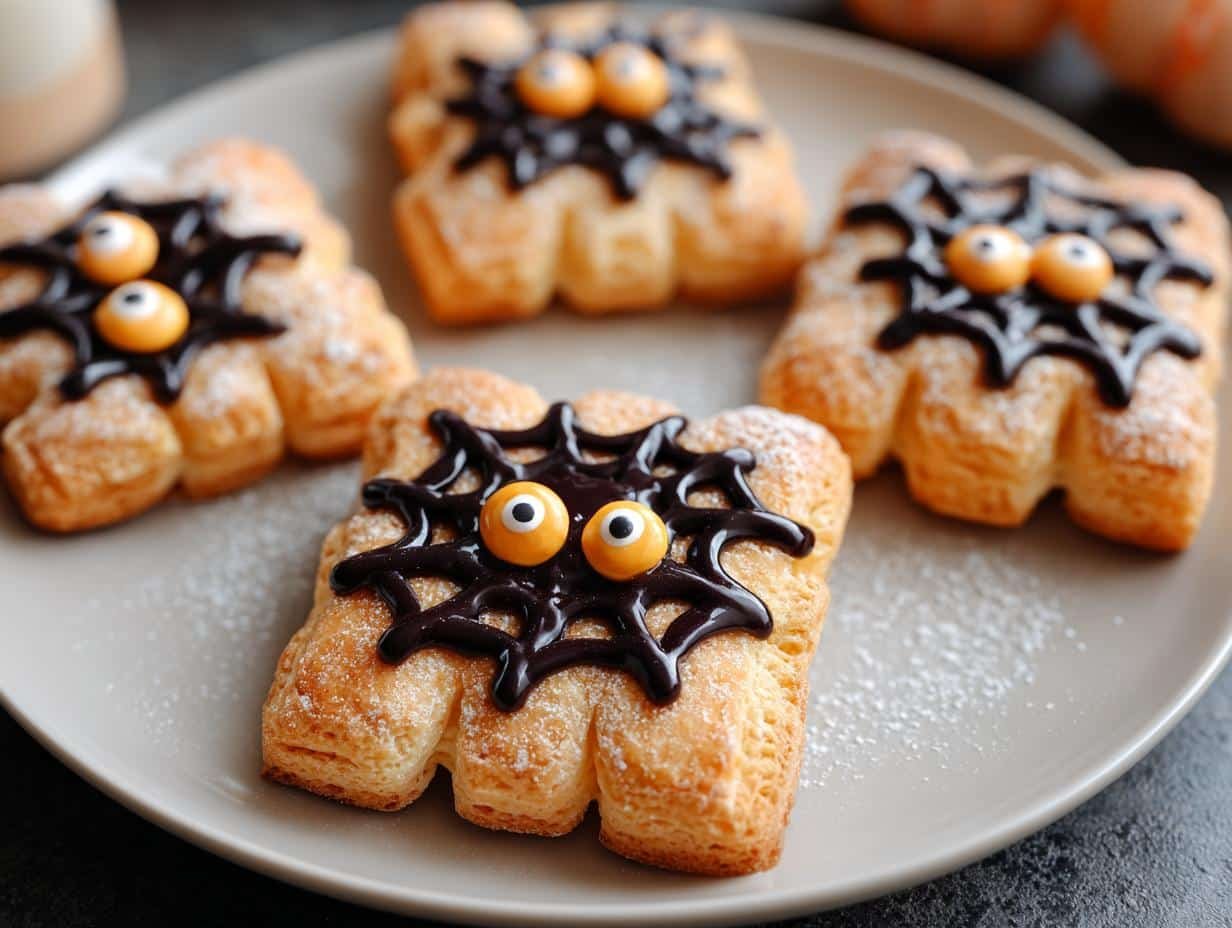
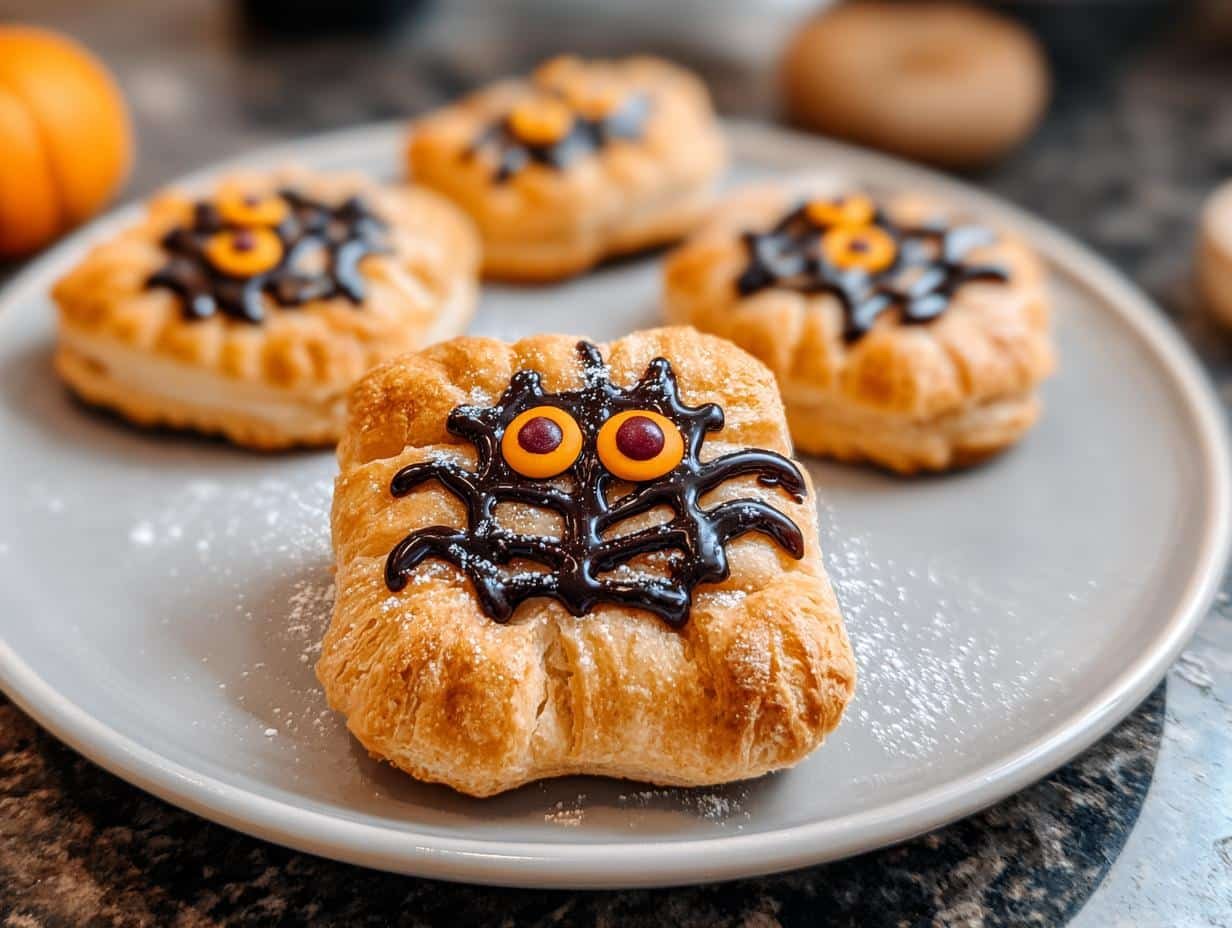
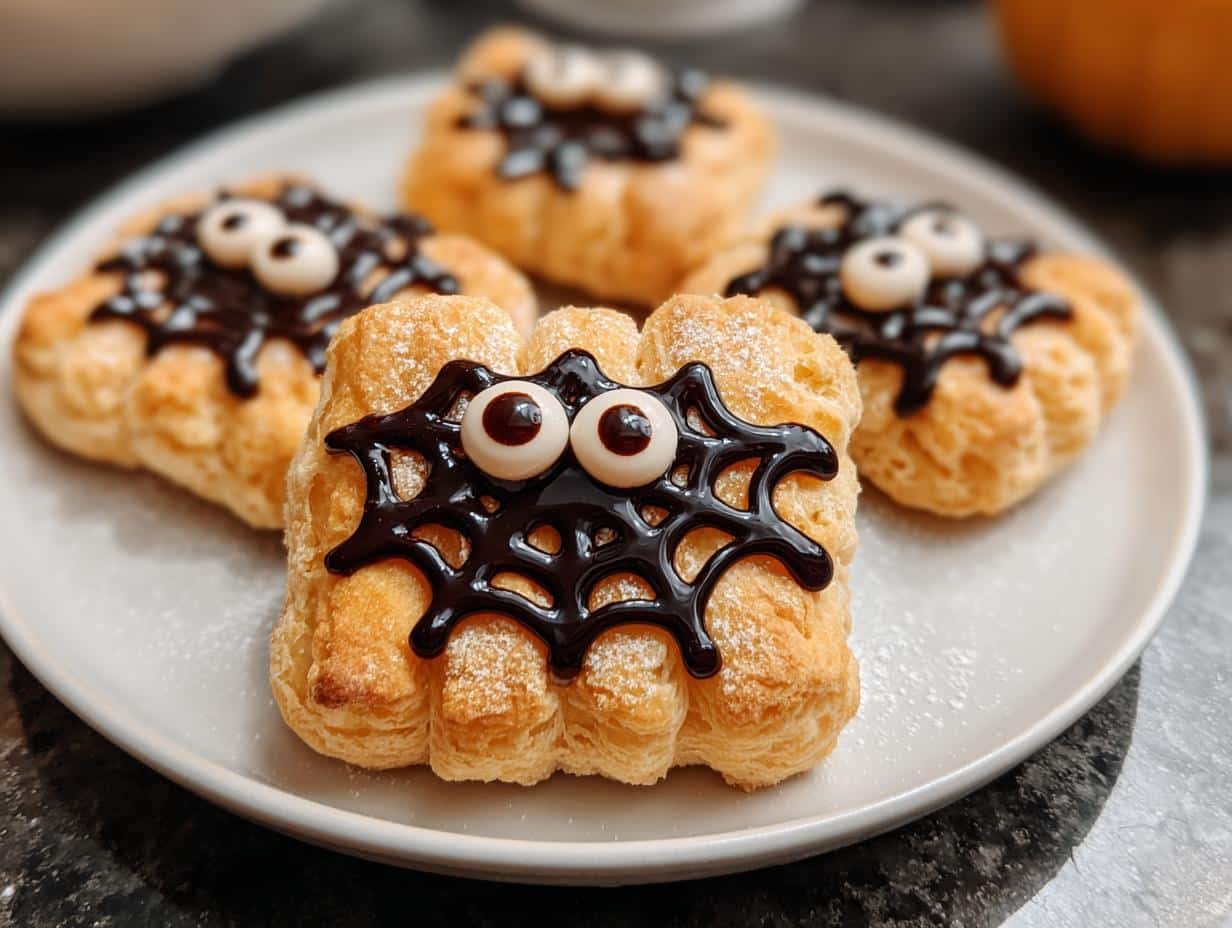
Halloween Poptarts have officially landed in my kitchen, and let me tell you, they’re a game-changer for spooky season! I remember my first attempt at making these, a bit intimidated by the idea, but the result was so much fun. The smell of warm pastry and sweet jam filling the air, it’s pure autumn magic. These aren’t just treats; they’re edible decorations that bring smiles to everyone’s faces. If you’re looking for some seriously fun Spooky Poptarts ideas, you’ve come to the right place. They are surprisingly Easy Halloween Poptarts to whip up, and the thrill of creating your own custom designs makes them perfect for a DIY Halloween Poptarts project with the kids. Let’s get cooking!
Why You’ll Love These Halloween Poptarts
- Incredible taste: Flaky pastry meets sweet, gooey fillings for a delightful bite.
- Super quick prep: Ready in just 15 minutes, perfect for busy evenings.
- Budget-friendly fun: Uses common pantry staples, making them an affordable treat.
- Family bonding: These are incredibly Kid-friendly Halloween Poptarts that everyone can help make.
- Customizable creativity: Decorate them however you like for truly unique treats.
- They are so Festive Poptarts for Halloween, adding a touch of magic to any party.
- A guaranteed hit: Kids and adults alike will devour these homemade delights.
Ingredients for Homemade Halloween Poptarts
Gathering your ingredients is the first step to creating these amazing Halloween Poptarts. You’ll only need a few simple things to get started. I love using ready-made pie crust or puff pastry because it makes the process so much faster and easier, perfect for those last-minute spooky cravings!
- 2 sheets of ready-made pie crust or puff pastry – choose your favorite for perfect flakiness
- 1 egg – for a beautiful golden egg wash that makes them shine
- 6–8 teaspoons chocolate spread, jam, or marshmallow fluff – this is your filling; get creative with fruity or chocolatey flavors!
- Optional: crushed graham crackers or mini chocolate chips – if you’re feeling a s’mores vibe
- Colored icing (black, white, orange, purple) – essential for your Halloween Poptarts frosting and decorations
- Candy eyes, sprinkles, mini marshmallows – for those adorable spooky faces and extra flair
- Powdered sugar – if you want a simple white glaze or to mix into your frosting
How to Make Easy Halloween Poptarts
Let’s dive into how to make Halloween Poptarts that are as fun to create as they are to eat! These steps are super straightforward, making it a breeze even if you’re new to baking. The aroma of baking pastry will fill your kitchen, signaling that deliciousness is on its way.
- Step 1: First things first, get that oven preheated to 375°F (190°C). While it’s warming up, line a baking sheet with parchment paper. This is crucial for easy cleanup and preventing any sticky situations.
- Step 2: Gently unroll your pastry sheets. Whether you’re using pie crust or puff pastry, the goal is to cut them into even rectangles. A sharp knife or a pizza cutter works best for clean edges. You should aim for about 6 to 8 rectangles, depending on your desired pop tart size.
- Step 3: Now for the fun part – the filling! Spoon about 1 teaspoon of your chosen filling onto half of the pastry rectangles. Make sure to leave a little space around the edges so the filling doesn’t ooze out during baking. Chocolate, jam, or marshmallow fluff all work wonderfully for these Halloween themed Poptarts.
- Step 4: Take the remaining pastry rectangles and place them over the filled ones. Use a fork to gently press down along the edges. This seals the pop tarts, keeping all that yummy filling inside. Then, give the tops a light brush with the beaten egg for a beautiful, golden finish.
- Step 5: Carefully transfer the prepared pop tarts to your lined baking sheet. Bake for 15–18 minutes, or until they’re a lovely golden brown. Keep an eye on them towards the end to prevent burning. The smell is absolutely divine at this stage!
- Step 6: Once baked, remove them from the oven and let them cool completely on a wire rack. This is super important before you start decorating, otherwise, your icing will melt right off.
- Step 7: Time for decorations! This is where you can really let your creativity shine. Use your colored icing to draw spooky faces, classic spiderwebs, or even a haunted house. Add candy eyes, sprinkles, or mini marshmallows to bring your Halloween themed Poptarts to life. Get creative with your Halloween Poptarts decorations and make them uniquely yours!
Pro Tips for the Best Halloween Poptarts
I’ve made countless batches of these festive treats, and I’ve picked up a few tricks that really elevate them. Following these simple tips will ensure your homemade delights are a spooky success!
- Don’t skip the egg wash! It gives the pastry that beautiful golden sheen that makes them look professionally done.
- When sealing the edges, press firmly with a fork. This prevents your delicious fillings from escaping during baking.
- Let them cool *completely* before decorating. I’ve learned this the hard way – warm pop tarts mean melted icing and messy designs!
- For extra flavor, try adding a pinch of cinnamon to the pastry dough or a bit of pumpkin puree to the filling.
What’s the secret to perfect Halloween Poptarts?
The real secret to perfect Halloween Poptarts is in the sealing and cooling. Make sure those edges are well-crimped to keep everything contained. Also, patience is key; letting them cool completely before decorating ensures your designs stay crisp and clean, making them truly Customizable Halloween Poptarts.
Can I make Halloween Poptarts ahead of time?
Yes, you absolutely can! You can prepare the unbaked pop tarts, seal them, and store them in the refrigerator for up to 24 hours before baking. Just be sure to keep them covered so they don’t dry out. This is a great way to get a head start on your baking!
How do I avoid common mistakes with Halloween Poptarts?
The most common mistakes in any Halloween Poptarts recipe are overfilling and not sealing properly, which leads to leaks. Another pitfall is decorating too soon. Ensure your pop tarts are fully cooled before applying frosting and decorations to prevent a melty mess.
Best Ways to Serve Halloween Poptarts
These festive treats are incredibly versatile! For a classic Halloween spread, pair your Halloween Poptarts with a cold glass of milk or a warm mug of apple cider. They’re also fantastic alongside some spooky snacks like a cheese ball shaped like a pumpkin or a bowl of “monster” pretzel rods. Imagine serving these alongside some adorable Pumpkin Poptarts Halloween treats for a coordinated dessert table, or offering a platter with both spooky Ghost Poptarts Halloween designs and classic Halloween Poptart flavors. They make a perfect addition to any Halloween party buffet or a fun after-school snack for the kids.

Nutrition Facts for Halloween Poptarts
Here’s a look at the estimated nutritional breakdown for one of these delightful Halloween Poptarts. These figures can vary slightly depending on your chosen fillings and decorations, but they give you a good idea of what you’re enjoying!
- Calories: 250
- Fat: 12g
- Saturated Fat: 5g
- Protein: 3g
- Carbohydrates: 33g
- Fiber: 1g
- Sugar: 15g
- Sodium: 200mg
Nutritional values are estimates and may vary based on specific ingredients used.
How to Store and Reheat Halloween Poptarts
Once your incredible Halloween Poptarts are baked and beautifully decorated, you’ll want to know the best way to keep them fresh. Proper storage is key to maintaining their flaky texture and vibrant decorations. I always make sure mine are completely cooled before doing anything else – this is crucial for avoiding condensation and preserving the icing.
For Homemade Halloween Poptarts storage, place them in an airtight container. If you plan to enjoy them within 3-4 days, the refrigerator is a good spot. For longer-term enjoyment, you can freeze them for up to 3 months! Just wrap each pop tart individually in plastic wrap, then in foil, to protect them from freezer burn. When you’re ready to reheat, simply take them out of the freezer, let them thaw for a bit, and then warm them gently in a toaster oven or a conventional oven at around 300°F (150°C) for a few minutes until warmed through. This keeps them tasting almost as fresh as the day you made them!
Frequently Asked Questions About Halloween Poptarts
What are Halloween Poptarts?
Halloween Poptarts are essentially homemade, festive versions of the classic toaster pastry, decked out in spooky themes for the holiday. They’re made with flaky pastry, filled with sweet goodies like jam or chocolate, and then decorated with colorful icing and Halloween-themed candies. They’re a fun, customizable treat that brings a creative twist to a familiar favorite, perfect for any Halloween celebration.
Can I use different fillings for my Halloween Poptarts?
Absolutely! The beauty of these is their versatility. While jam and chocolate spread are popular, feel free to experiment with marshmallow fluff for a gooey center, or even a mix of cream cheese and fruit. For a s’mores version, try chocolate spread with crushed graham crackers. The possibilities are endless, making them truly Customizable Halloween Poptarts!
How do I create detailed designs like spiderwebs on my Halloween Poptarts?
Achieving intricate designs like Spiderweb Poptarts Halloween decorations is easier than you think! Start with a base layer of frosting, usually white or black. Then, pipe concentric circles of a contrasting color from the center outwards. Drag a toothpick or skewer from the center to the edge of each circle to create the web effect. It takes a little practice, but the results are spooktacular!
Are these Halloween Poptarts suitable for young children to make?
Yes, these are fantastic for kids! They’re incredibly Kid-friendly Halloween Poptarts. Younger children can help with spooning the filling, pressing the edges with a fork (with supervision), and most importantly, decorating with sprinkles and candy eyes. Older kids can handle the cutting and piping for more intricate designs. It’s a wonderful activity for family bonding during the spooky season.
Variations of Halloween Poptarts You Can Try
Beyond the classic jam or chocolate, these Halloween Poptarts are a blank canvas for your creativity! I love experimenting with different flavors and themes to make each batch unique. If you’re looking for some inspiration, consider these fun twists. For a deeply decadent treat, try the Chocolate Halloween Poptarts, using a rich chocolate ganache or Nutella as your filling and decorating with dark icing and chocolate sprinkles.
If you prefer something brighter, go for Fruity Halloween Poptarts by using vibrant raspberry, cherry, or even a mix of berries for your filling. For a truly monstrous creation, whip up some Monster Poptarts Halloween by topping them with green or purple icing, candy eyeballs, and jagged frosting details. You can even adapt these for different dietary needs, like using gluten-free pastry or vegan cream cheese frosting. Don’t be afraid to play around with different baking methods too, though the oven method remains the most reliable for that perfect flaky crust!
Print
Halloween Poptarts: 15 Min Festive Treats
- Total Time: 33 minutes
- Yield: 6–8 pop tarts 1x
- Diet: Vegetarian
Description
Sweet, flaky, and spooky, these Halloween Poptarts are the perfect treat for kids and adults alike. Filled with jam, chocolate, or marshmallow and decorated with festive icing and candy eyes, they’re a fun and delicious addition to your Halloween celebration.
Ingredients
- 2 sheets of ready-made pie crust or puff pastry
- 1 egg (for egg wash)
- 6 – 8 teaspoons chocolate spread, jam, or marshmallow fluff
- Optional: crushed graham crackers or mini chocolate chips (for s’mores version)
- Colored icing (black, white, orange, purple)
- Candy eyes, sprinkles, mini marshmallows
- Powdered sugar (optional)
Instructions
- Preheat oven to 375°F (190°C) and line a baking sheet with parchment paper.
- Unroll pastry and cut into even rectangles using a sharp knife or pizza cutter.
- Spoon 1 teaspoon of filling onto half the rectangles, leaving space at the edges.
- Cover with another rectangle, press edges with a fork, and brush tops with egg wash.
- Bake for 15–18 minutes or until golden brown.
- Cool completely on a wire rack.
- Decorate: Use icing to draw spooky faces or webs, and add candy eyes or sprinkles.
Notes
- Seal the edges well to prevent leaking.
- Don’t overfill the center to avoid bursting.
- Cool completely before decorating with icing.
- Use pumpkin puree for a savory twist or s’mores mix for a sweet surprise.
- Store in an airtight container or freeze individually for later.
- Prep Time: 15 minutes
- Cook Time: 18 minutes
- Category: Dessert
- Method: Baking
- Cuisine: Halloween
Nutrition
- Serving Size: 1 pop tart

