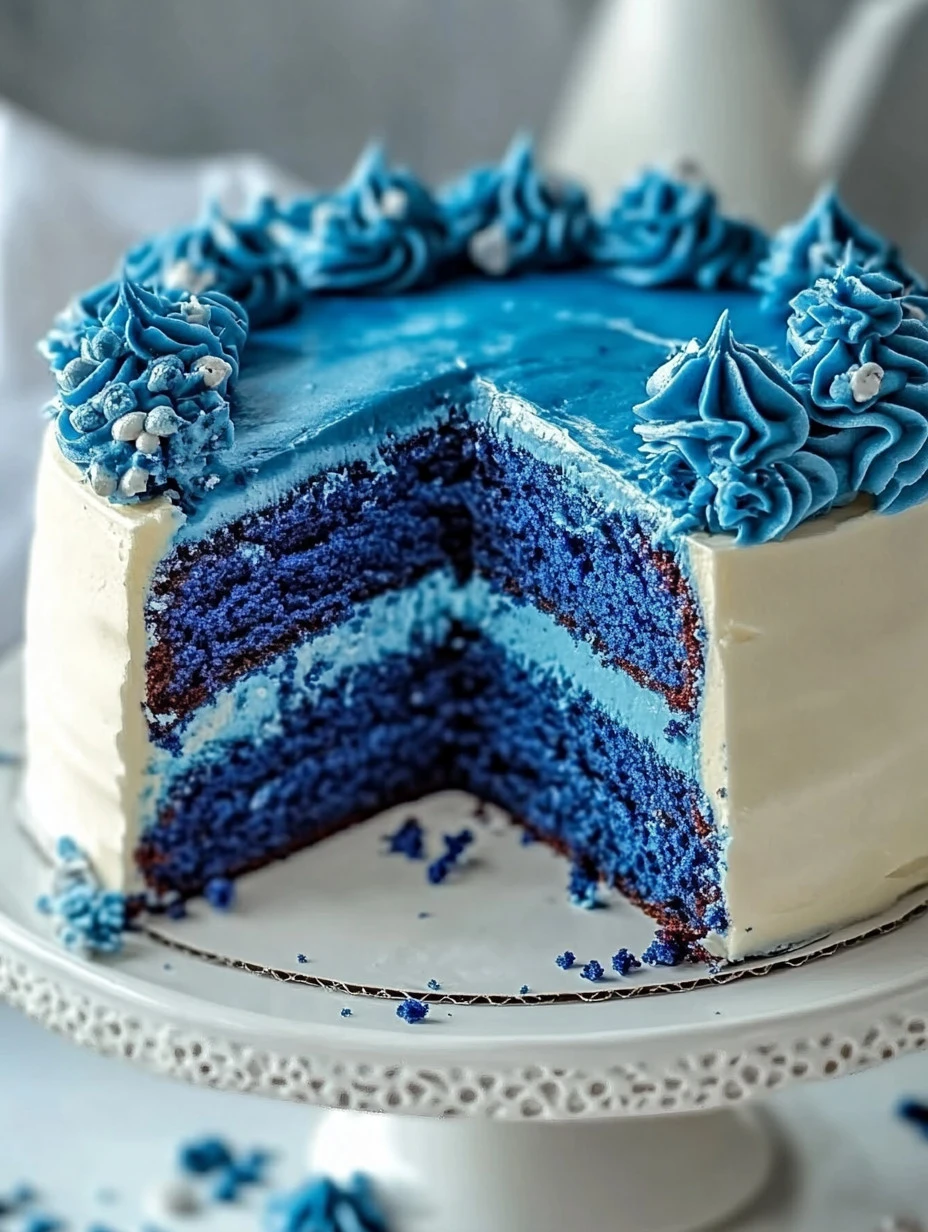
Let’s face it, some days just call for a little slice of indulgence, don’t they? And that’s where my Blue Velvet Cake swoops in like a culinary superhero, ready to turn any ordinary moment into a special celebration. This vibrant, richly flavored cake isn’t just a feast for the eyes, but it also delivers a delightful taste experience that’s sure to win over even the pickiest of cake lovers. Whether you’re planning a birthday bash or just want to treat yourself after a long week, this recipe is your new best friend.
Why You’ll Love This Blue Velvet Cake
Who wouldn’t want to impress their friends and family with a stunning cake that tastes as good as it looks? The deep blue color sets it apart, making it the perfect choice for baby showers, birthday parties, or even just an afternoon pick-me-up. Plus, the combination of cream cheese frosting and the moist, fluffy cake is a match made in food heaven. Trust me, after one bite, you’ll be telling everyone that you baked it from scratch… even if you might have had a little help from your favorite baking mix!
Ingredients for Blue Velvet Cake
Here’s what you’ll need to create this masterpiece:
Cake Ingredients:
- 2 ½ cups all-purpose flour
- 1 ½ cups granulated sugar
- 1 teaspoon baking soda
- 1 teaspoon salt
- 1 cup vegetable oil
- 1 cup buttermilk, at room temperature
- 3 large eggs
- 2 tablespoons blue food coloring
- 1 teaspoon vanilla extract
- 1 teaspoon white vinegar
Cream Cheese Frosting Ingredients:
- 1 cup cream cheese, softened
- ½ cup unsalted butter, softened
- 4 cups powdered sugar
- 1 teaspoon vanilla extract
- A pinch of salt
Steps to Your Dream Cake
- Preheat Your Oven: Start by preheating your oven to 350°F (175°C) and greasing two 9-inch round cake pans. Nothing worse than cake sticking to the pan, right?
- Mix Dry Ingredients: In a large mixing bowl, whisk together the flour, sugar, baking soda, and salt until well combined.
- Mix Wet Ingredients: In a separate bowl, combine the oil, buttermilk, eggs, blue food coloring, vanilla extract, and vinegar. Whisk until everything is beautifully blended—don’t worry if you feel like a mad scientist at this stage!
- Combine: Gradually add the wet mixture to the dry ingredients, mixing gently until everything is just combined. No need to go overboard; we want a moist fluffy cake, not a tough one!
- Bake: Divide the batter evenly between your prepared cake pans. Pop them in the oven and bake for about 25-30 minutes, or until a toothpick inserted into the center comes out clean. The aroma wafting through your kitchen will have your neighbors peeking through the windows—trust me on that!
- Cool: Let the cakes cool in the pans for about 10 minutes, then carefully turn them out onto a wire rack to cool completely. Patience is key; we don’t want melting frosting!
- Frosting Time: While the cakes cool, you can whip up that luscious cream cheese frosting. In a bowl, beat together the cream cheese and butter until smooth. Gradually add the powdered sugar, vanilla, and salt, mixing until you reach your preferred consistency—smooth, creamy, and irresistibly delicious.
- Assemble: Once the cakes are completely cool, spread a generous amount of frosting on top of one layer. Place the second layer on top and frost the top and sides of the entire cake like the masterpiece it is!
- Decorate: Need some ideas? Throw on some edible glitter, fresh blueberries, or even colorful sprinkles to give it that extra pop. And voila!
Cooking Tips
- Ingredient Substitutions: Don’t have buttermilk? No worries! Just mix one cup of milk with a tablespoon of vinegar and let it sit for 5 minutes—it works like a charm.
- Leftover Cake: If you do have leftovers (fingers crossed!), store them in an airtight container in the fridge. It’ll stay delicious for a few days, but good luck keeping it around that long!
- Make It Fun: Invite your kids to help with the mixing or frosting. Baking can be messy, but it’s a blast to do it together—just hold back the urge to hover!
FAQs
Can I substitute the blue food coloring?
Absolutely! You can use natural fruit or vegetable dyes, but keep in mind that the color might not pop as vibrantly.
How can I store leftovers?
Keep your Blue Velvet Cake in the fridge in an airtight container. It’s a delightful treat straight from the cold, too!
Can I make this cake ahead of time?
You bet! You can bake and freeze the layers before frosting them. When you’re ready to serve, just thaw and frost as desired.
There you have it—your very own Blue Velvet Cake that’s not only a feast for the eyes but a triumph for the taste buds! You’ve got this, and I can’t wait to hear how yours turns out. Share your baking stories with me, and let’s keep the joy of cooking alive and flourishing! Now, grab that apron and let’s dive into creating some sweet memories togeth
For more recipes go check Strawberry Cream Cheese Icebox Cake and easter dirt cake casserole
Print
Blue Velvet Cake
Description
Who wouldn’t want to impress their friends and family with a stunning cake that tastes as good as it looks? The deep blue color sets it apart, making it the perfect choice for baby showers, birthday parties, or even just an afternoon pick-me-up. Plus, the combination of cream cheese frosting and the moist, fluffy cake is a match made in food heaven. Trust me, after one bite, you’ll be telling everyone that you baked it from scratch… even if you might have had a little help from your favorite baking mix!
Ingredients
- 2 ½ cups all-purpose flour
- 1 ½ cups granulated sugar
- 1 teaspoon baking soda
- 1 teaspoon salt
- 1 cup vegetable oil
- 1 cup buttermilk, at room temperature
- 3 large eggs
- 2 tablespoons blue food coloring
- 1 teaspoon vanilla extract
- 1 teaspoon white vinegar
- 1 cup cream cheese, softened
- ½ cup unsalted butter, softened
- 4 cups powdered sugar
- 1 teaspoon vanilla extract
- A pinch of salt
Instructions
- Preheat Your Oven: Start by preheating your oven to 350°F (175°C) and greasing two 9-inch round cake pans. Nothing worse than cake sticking to the pan, right?
- Mix Dry Ingredients: In a large mixing bowl, whisk together the flour, sugar, baking soda, and salt until well combined.
- Mix Wet Ingredients: In a separate bowl, combine the oil, buttermilk, eggs, blue food coloring, vanilla extract, and vinegar. Whisk until everything is beautifully blended—don’t worry if you feel like a mad scientist at this stage!
- Combine: Gradually add the wet mixture to the dry ingredients, mixing gently until everything is just combined. No need to go overboard; we want a moist fluffy cake, not a tough one!
- Bake: Divide the batter evenly between your prepared cake pans. Pop them in the oven and bake for about 25-30 minutes, or until a toothpick inserted into the center comes out clean. The aroma wafting through your kitchen will have your neighbors peeking through the windows—trust me on that!
- Cool: Let the cakes cool in the pans for about 10 minutes, then carefully turn them out onto a wire rack to cool completely. Patience is key; we don’t want melting frosting!
- Frosting Time: While the cakes cool, you can whip up that luscious cream cheese frosting. In a bowl, beat together the cream cheese and butter until smooth. Gradually add the powdered sugar, vanilla, and salt, mixing until you reach your preferred consistency—smooth, creamy, and irresistibly delicious.
- Assemble: Once the cakes are completely cool, spread a generous amount of frosting on top of one layer. Place the second layer on top and frost the top and sides of the entire cake like the masterpiece it is!
- Decorate: Need some ideas? Throw on some edible glitter, fresh blueberries, or even colorful sprinkles to give it that extra pop. And voila!
Notes
- Ingredient Substitutions: Don’t have buttermilk? No worries! Just mix one cup of milk with a tablespoon of vinegar and let it sit for 5 minutes—it works like a charm.
- Leftover Cake: If you do have leftovers (fingers crossed!), store them in an airtight container in the fridge. It’ll stay delicious for a few days, but good luck keeping it around that long!
- Make It Fun: Invite your kids to help with the mixing or frosting. Baking can be messy, but it’s a blast to do it together—just hold back the urge to hover!
