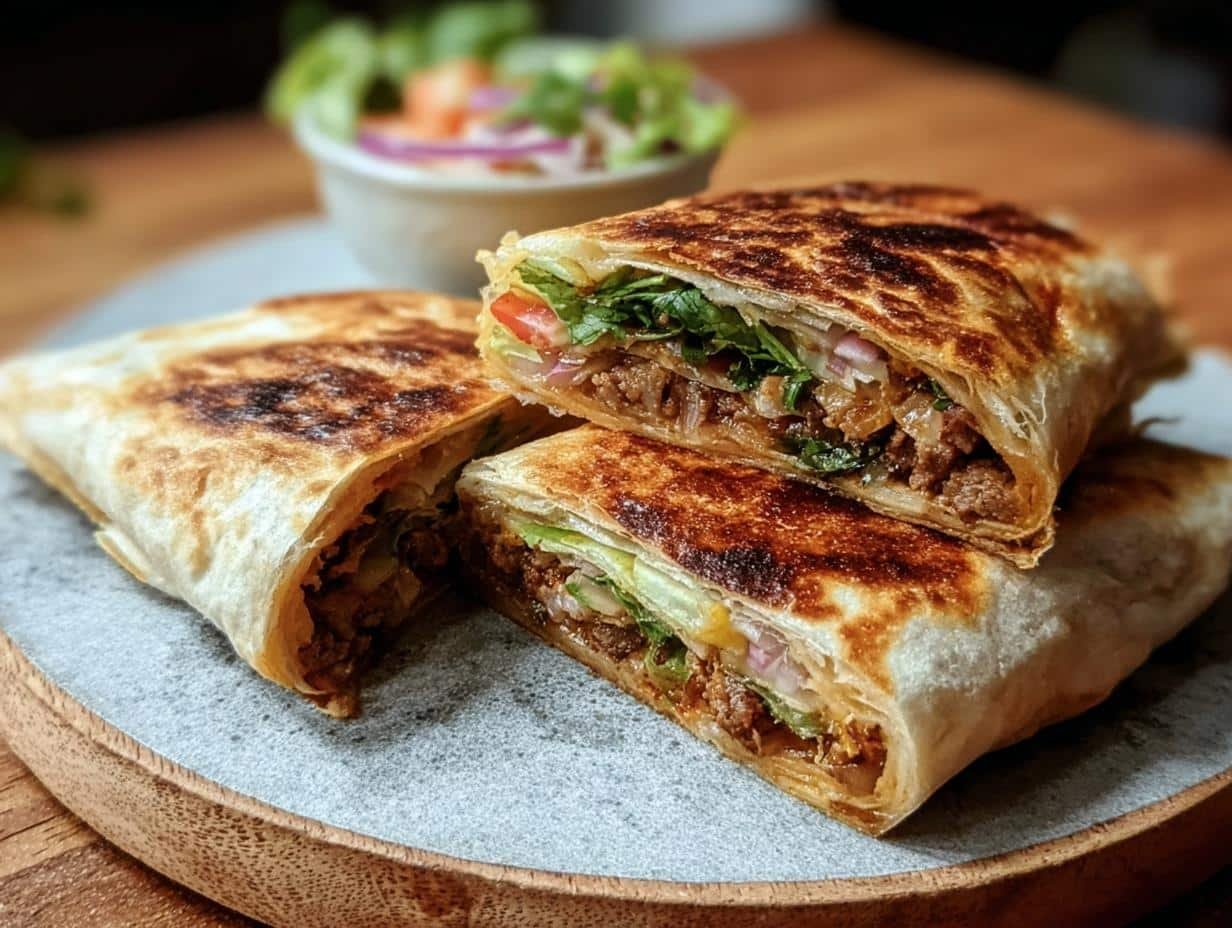
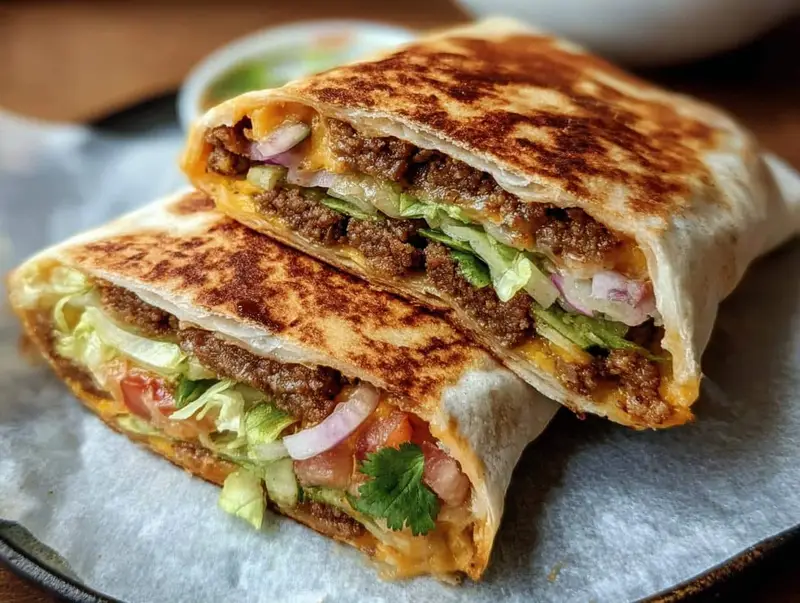
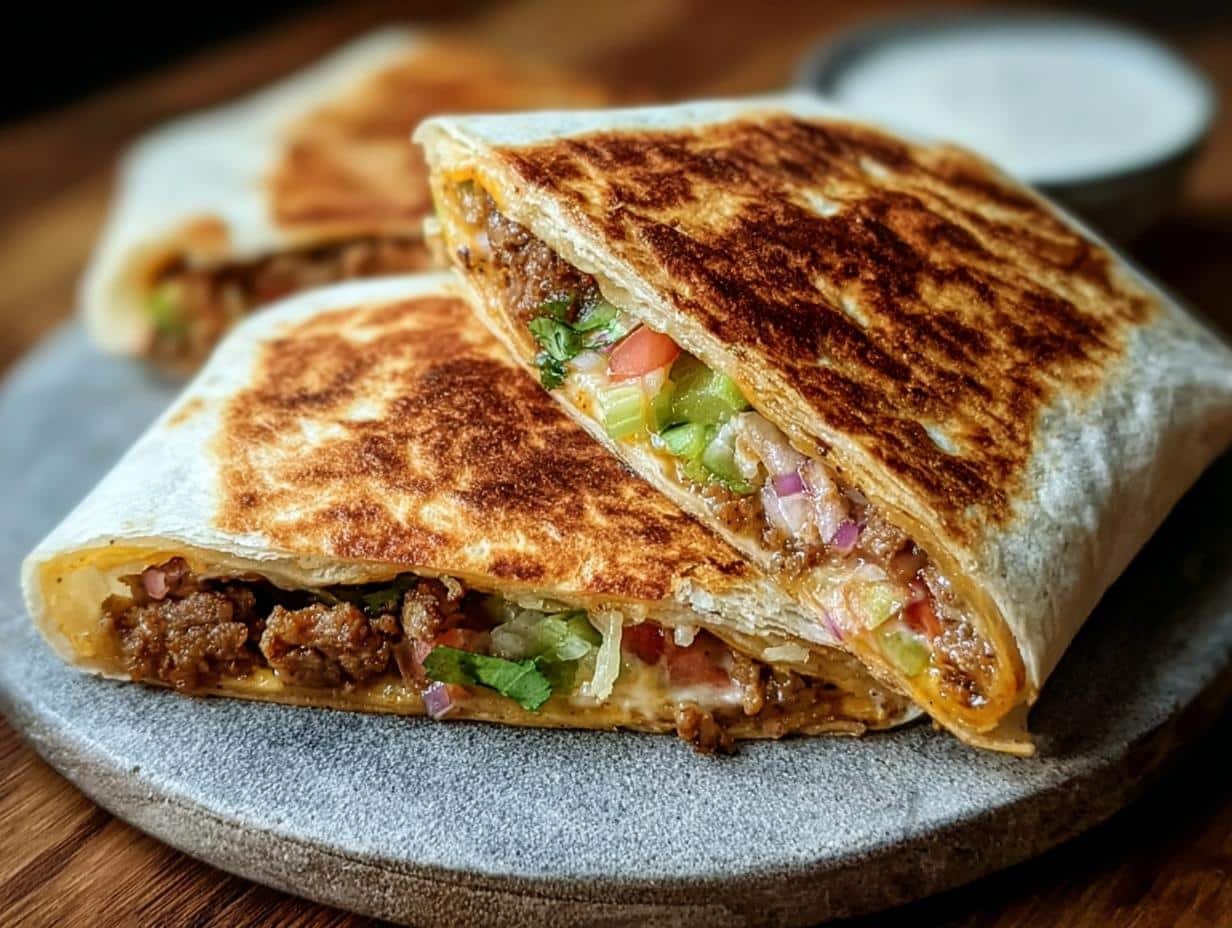
School snack time just got an upgrade with these amazing Mini Crunchwraps! I remember the first time I made these for my kids heading back to school – the sheer excitement on their faces when they saw these crispy, cheesy delights in their lunchboxes was priceless. They’re like a fast-food favorite you can totally make at home, and honestly, they smell incredible while they’re toasting. If you’re looking for easy after school snacks for kids that will be devoured in minutes, these are it. They’re also some of the best quick school snack recipes I’ve ever discovered. Let’s get cooking!
Why You’ll Love These Mini Crunchwraps
These aren’t just any snack; they’re a guaranteed hit for everyone! You’ll adore how incredibly delicious they are, with that perfect balance of crispy tortilla and savory, cheesy filling. Plus, I love that they only take about 25 minutes from start to finish, making them ideal for busy mornings. They’re truly among the best nutritious school snack ideas because you can sneak in lean protein and veggies. They’re also super budget-friendly, using simple ingredients you likely already have. These are fantastic nutritious school snack ideas that the whole family will beg for, from the youngest kindergartener to the pickiest teen.
- Amazing taste and texture
- Super quick prep and cook time
- Packed with protein and customizable veggies
- Cost-effective for feeding a crowd
- Kid-approved and family-favorite
- Great for busy schedules
Ingredients for Your School Snack Crunchwraps
Here’s what you’ll need to whip up these delightful crunchwraps, some of the best snack ideas for packed lunches:
- 1 lb ground beef or turkey – This forms the savory base. For a vegetarian option, 1 lb black beans, rinsed and drained, works wonderfully.
- 1 tbsp taco seasoning – Adds that classic Tex-Mex flavor that kids adore.
- 8 small flour tortillas (street taco size) – These are the perfect size for mini wraps.
- 8 round tortilla chips or mini tostadas – This is the secret to the signature crunch!
- 1 cup shredded cheddar or Mexican cheese blend – Melty cheese is a must for deliciousness.
- 1/2 cup sour cream or Greek yogurt – Adds a creamy coolness to balance the heat. Greek yogurt is a great way to boost protein and cut down on fat.
- 1/2 cup shredded lettuce – For a fresh, crisp texture.
- 1/4 cup chopped tomatoes or salsa – Adds a burst of freshness and moisture.
- 1 tbsp olive oil or cooking spray – For getting that perfect golden toast on the outside.
How to Make Quick School Snack Recipes
Whipping up these mini crunchwraps is easier than you think, and they’re truly some of the best easy and healthy school snacks you can make. Let’s get that delicious filling ready!
- Step 1: Cook the Filling. Grab a skillet and heat it over medium heat. If using ground beef or turkey, add it and cook, breaking it up with a spoon, until it’s nicely browned, about 5-7 minutes. Drain off any excess grease – nobody wants a greasy crunchwrap! Stir in the 1 tbsp taco seasoning and cook for another minute until fragrant. For a vegetarian twist, heat 1 lb black beans in the skillet with a teaspoon of cumin, a pinch of salt, and pepper until warmed through. The aroma of the seasoned filling is the first sign of deliciousness to come!
- Step 2: Assemble Your Crunchwraps. Lay out your 8 small flour tortillas on a clean surface. This is where the magic happens! On one half of each tortilla, layer your ingredients. Start with a generous spoonful of your warm meat or bean filling. Then, sprinkle over about 1/4 cup shredded cheddar cheese. Place one round tortilla chip or mini tostada on top of the cheese – this is your secret crunch element! Add a dollop of 1/2 cup sour cream or Greek yogurt, followed by 1/2 cup shredded lettuce and 1/4 cup chopped tomatoes.
- Step 3: Fold and Seal. Now, it’s time to create that signature crunchwrap shape. Carefully fold the edges of the tortilla inward, pleating it as you go to completely enclose the filling. Think of it like tucking everything in securely. Once folded, gently flip the crunchwrap so the seam-side is down. This helps it hold its shape. This step ensures all those tasty bits stay put, making them perfect for little hands.
- Step 4: Toast to Perfection. Heat 1 tbsp olive oil or use cooking spray in a clean skillet over medium heat. Once hot, carefully place your folded crunchwraps into the skillet, seam-side down. Toast for about 2-3 minutes until the bottom is beautifully golden brown and crispy. You should hear that satisfying sizzle! Gently flip them over and cook the other side for another 2-3 minutes until equally golden and the cheese inside is wonderfully melted. These are truly fantastic easy and healthy school snacks.
- Step 5: Cool and Pack. Let your mini crunchwraps cool on a wire rack for a few minutes before packing. This is crucial to prevent them from getting soggy in a lunchbox. Once slightly cooled, they are ready to be placed in a thermos or lunchbox. For an extra flavor boost, pack some salsa or guacamole on the side for dipping. These steps ensure your crunchwraps are the best part of any school day!
Pro Tips for the Best School Snack Crunchwraps
Want to make these even more amazing? I’ve learned a few tricks over the years that make these crunchwraps absolutely perfect for school lunches:
- Cool Completely Before Packing: This is the golden rule! Let them cool on a wire rack for at least 10-15 minutes after toasting. This prevents steam from building up and making the tortilla soggy inside the lunchbox.
- Don’t Overstuff: While it’s tempting to pack in tons of filling, resist the urge! Overstuffing makes them hard to fold, seal, and toast evenly, and can lead to spills.
- Prep Ahead: You can cook the filling and even assemble the crunchwraps (before toasting) the night before. Store them in an airtight container in the fridge.
- Toast in Batches: Don’t crowd the pan when toasting. Toast them in batches of 2-3 so they get evenly golden and crispy on both sides.
What’s the secret to perfect mini crunchwraps?
The secret lies in that middle layer: the round tortilla chip or mini tostada! It provides the signature crunch that makes them so irresistible, setting them apart from other best snacks for school lunches. Plus, don’t overstuff them!
Can I make these easy after school snacks for kids ahead of time?
Absolutely! You can prepare the filling up to 2 days in advance and store it in the fridge. You can also assemble the crunchwraps (before toasting) and refrigerate them overnight. Just toast them fresh in the morning!
How do I avoid common mistakes with homemade school snacks?
The biggest mistake is packing them while still warm, which leads to sogginess. Always let them cool completely! Another pitfall is overstuffing, making them messy. Finally, ensure your skillet is properly heated for an even, golden toast. For more tips on food safety, check out the FoodSafety.gov guidelines.
Best Ways to Serve Your School Snack Crunchwraps
These mini crunchwraps are fantastic on their own, but they truly shine with a few perfect pairings. For a complete lunchbox meal, consider serving them with some fresh fruit like apple slices or berries. A small container of guacamole or extra salsa is always a hit for dipping, adding an extra layer of flavor and fun. If you’re looking for school lunch snack alternatives that still feel special, try serving these alongside a small cup of corn salsa or some seasoned black beans. They’re versatile enough to be the star or a delicious component of a larger meal!
Nutrition Facts for Mini Crunchwraps
Here’s a look at the estimated nutritional breakdown for these delicious mini crunchwraps, making them a smart choice among school snack options:
- Calories: 350
- Fat: 18g
- Saturated Fat: 7g
- Protein: 15g
- Carbohydrates: 30g
- Fiber: 4g
- Sugar: 3g
- Sodium: 550mg
Nutritional values are estimates and may vary based on specific ingredients used.
How to Store and Reheat School Snack Crunchwraps
These mini crunchwraps are fantastic for meal prep, making them some of the best make ahead school snacks you can find. Once they’re fully cooled after toasting, store them in an airtight container. For the best quality, I recommend keeping them in the refrigerator for up to 3-4 days. If you want to prep even further ahead, you can freeze the *untoasted* assembled crunchwraps for up to 3 months! Just make sure to wrap them well in plastic wrap and then aluminum foil.
Reheating Instructions:
To reheat refrigerated crunchwraps, simply place them in a skillet over medium-low heat for a few minutes per side until warmed through and crispy again. For frozen crunchwraps, you can toast them directly from frozen in a dry skillet over medium-low heat, adding a few extra minutes to each side, or thaw them overnight in the fridge first.
Frequently Asked Questions About School Snack Crunchwraps
Got questions about these fun and tasty crunchwraps? I’ve got answers to help you make them the best they can be for your little ones!
What are good snacks for school?
These mini crunchwraps are excellent school snacks because they’re portable, customizable, and packed with flavor. They offer a satisfying crunch and a cheesy, savory filling that kids love. They’re much better than processed snacks and give kids sustained energy for their school day.
Can I make these for a school snack box?
Absolutely! These crunchwraps are a fantastic addition to any school snack box. Their compact size makes them easy to pack, and they hold up well throughout the school day, especially if cooled properly before packing. They’re a great way to add a fun, homemade element to their lunch.
How do I make these school snack crunchwraps appealing to picky eaters?
The beauty of these crunchwraps is their customizability! For picky eaters, start with a very simple filling – just the meat or beans, cheese, and maybe a tiny bit of sour cream. You can gradually introduce other ingredients like lettuce or tomatoes as they become more adventurous. The crunch factor itself is often a big win for kids too!
Are these good school lunch snack alternatives?
Yes, they are wonderful school lunch snack alternatives! Instead of a sandwich or chips, these offer a unique texture and flavor combination. They feel like a special treat, making lunch more exciting. They also pair well with simple sides like fruit or veggie sticks, creating a well-rounded and appealing meal.
Variations of School Snack Crunchwraps You Can Try
Looking for more ways to spice up your lunch routine? These mini crunchwraps are incredibly versatile, and I love experimenting with new flavor combinations. Here are a few ideas to get your creativity flowing and make some truly creative school snack recipes:
- Breakfast Crunchwraps: Swap the savory filling for scrambled eggs, cheese, and a sprinkle of bacon bits or sausage. Perfect for a hearty breakfast-to-go!
- Pizza Crunchwraps: Use marinara sauce as the base, add mini pepperoni or cooked Italian sausage, and plenty of mozzarella cheese. It’s like a handheld pizza pocket!
- Spicy Chicken Crunchwraps: Use shredded rotisserie chicken tossed with buffalo sauce or a spicy BBQ sauce, then add shredded cheese and a drizzle of ranch or blue cheese dressing.
- Veggie Delight Crunchwraps: For a lighter option, fill them with seasoned black beans, corn, diced bell peppers, and a sprinkle of Monterey Jack cheese.
These variations ensure that snack time is always exciting and caters to different tastes, making them some of the most adaptable school lunch snack alternatives.

For more inspiration on creative school snacks, check out these creative school lunch ideas.
Print
School Snack Winners: 25 Min Crunchwrap Magic
- Total Time: 25 minutes
- Yield: 6-8 mini crunchwraps 1x
- Diet: Vegetarian
Description
These Mini Crunchwraps are the ultimate first day of school snack. They are crispy, cheesy, and customizable, perfect for kindergartners to teens. Made at home, they feel like a fast-food treat and are ideal for lunchboxes. These versatile wraps can be prepped ahead for stress-free mornings.
Ingredients
- 1 lb ground beef or turkey (or black beans for vegetarian option)
- 1 tbsp taco seasoning
- 8 small flour tortillas (street taco size)
- 8 round tortilla chips or mini tostadas
- 1 cup shredded cheddar or Mexican cheese blend
- 1/2 cup sour cream or Greek yogurt
- 1/2 cup shredded lettuce
- 1/4 cup chopped tomatoes or salsa
- 1 tbsp olive oil or cooking spray
Instructions
- Cook filling: Brown ground beef or turkey in a skillet with taco seasoning. For vegetarian option, heat black beans with cumin, salt, and pepper.
- Assemble: Place a tortilla on a flat surface. Add a spoonful of meat or beans, cheese, a tortilla chip or tostada, sour cream, lettuce, and tomatoes.
- Fold and seal: Fold the tortilla edges inward, pleating to enclose the filling completely. Flip seam-side down.
- Toast: Heat a skillet with olive oil or spray. Toast crunchwraps seam-side down for 2–3 minutes, then flip and cook until golden.
- Cool and pack: Let cool slightly before placing in a thermos or lunchbox with salsa or guacamole for dipping.
Notes
- Cool wraps fully before packing to avoid sogginess.
- Use whole wheat tortillas or Greek yogurt for healthier swaps.
- Pack sauces separately to keep wraps crisp.
- Freeze unbaked crunchwraps for easy weekday lunches.
- Teens can enjoy a DIY version by assembling their own at school.
- Prep Time: 15 minutes
- Cook Time: 10 minutes
- Category: Lunch, Snacks, School Lunch
- Method: Pan-Fried
- Cuisine: Mexican-Inspired
Nutrition
- Serving Size: 1 crunchwrap

