Introduction
Hey there, dessert aficionados! If you’re anything like me, your day might be a whirlwind of activities, from managing your job to juggling family commitments and trying to find time for yourself. Well, have I got a treat for you! These Peanut Butter Cheesecake Cups are not only irresistibly yummy, but they’re also super simple to whip up. Whether you’re looking to impress guests at the next get-together or simply want a sweet escape after a long day, these bite-sized delights are the answer. Trust me; your taste buds will thank you!
Why You’ll Love This Peanut Butter Cheesecake Cups Recipe
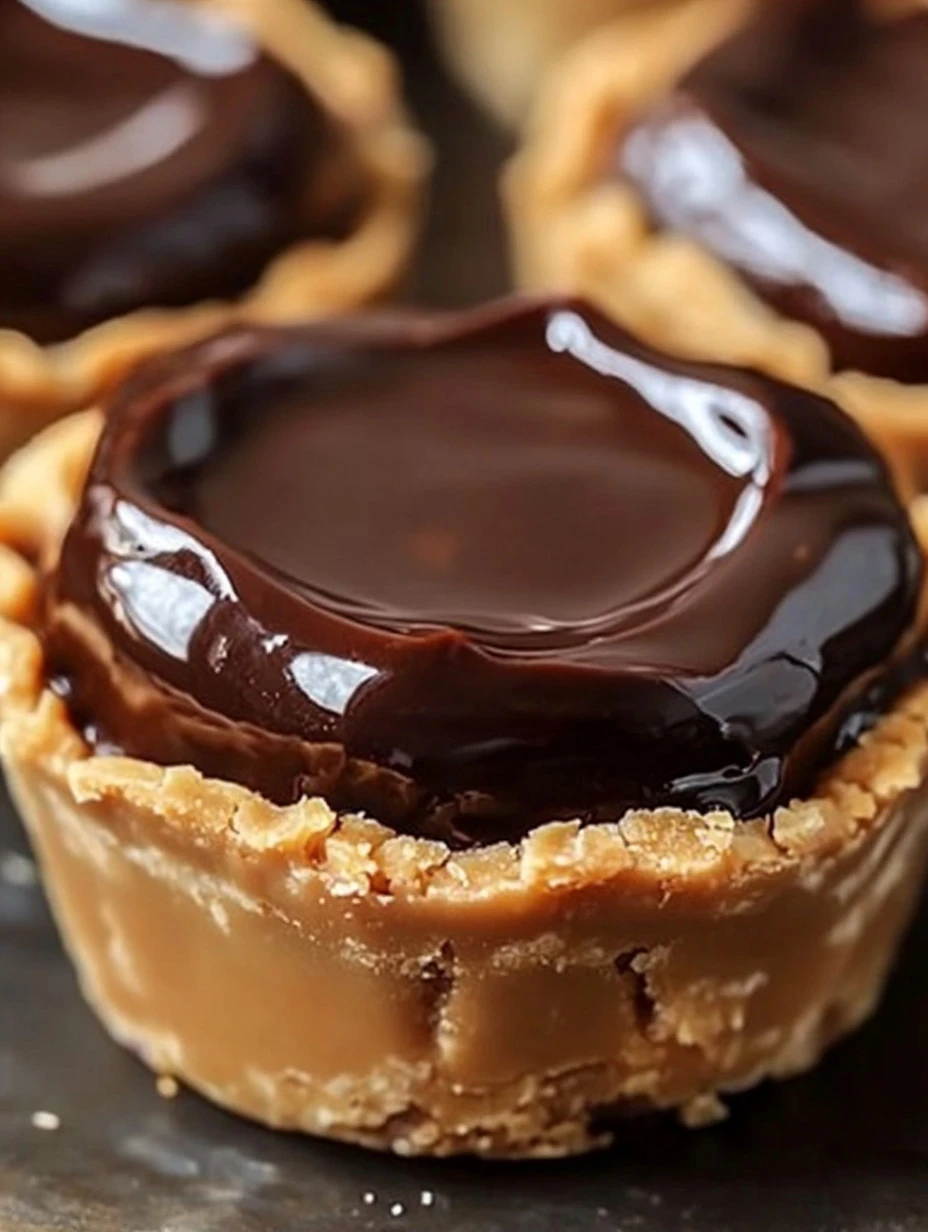
Just picture it: a buttery graham cracker crust supporting a rich, creamy filling of peanut butter and cream cheese, topped off with whipped cream and a sprinkle of chocolate chips. Sounds heavenly, doesn’t it? The best part? You don’t need a culinary degree to create this masterpiece. I promise you’ll feel like a superstar in the kitchen!
Ingredients
Before we dive into the magic of making these cups, here’s what you’ll need:
- 1 cup crushed graham crackers
- 1/4 cup granulated sugar
- 1/4 cup unsalted butter, melted
- 1 cup creamy peanut butter
- 8 oz cream cheese, softened
- 1 cup powdered sugar
- 1 tsp vanilla extract
- 1 cup whipped cream
- 1 cup semi-sweet chocolate chips
- 1/2 cup heavy cream
Simple enough, right? These ingredients blend together to create pure dessert joy!
Steps to Deliciousness
- Preheat and Prepare: First things first, preheat your oven to 350°F (175°C). Line your muffin tin with paper liners; it’s like giving your cheesecake cups a cozy bed to rest on.
- Crust Creation: In a medium bowl, mix together the crushed graham crackers, granulated sugar, and melted butter. Use a fork or your hands (don’t worry, it’s fun!) to combine everything until the mixture resembles damp sand.
- Press and Bake: Now, press this mixture firmly into the bottom of each muffin liner to form your crust. Bake for about 5 minutes, then remove them from the oven and let them cool completely (even superheroes need a break, right?).
- Filling Time: While your crusts are chilling like the cool kids, get a large bowl and beat the softened cream cheese and creamy peanut butter. Once it’s nice and smooth (think velvet), mix in the powdered sugar and vanilla extract until everything is well blended.
- The Grand Assembly: Fold in that glorious whipped cream gently. You want to keep the lightness—we’re going for airy, not dense! Spoon the mixture into your cooled crusts.
- Chill Out: Pop these beauties into the fridge for a bit (at least 2 hours) to firm up. It’s the hardest part, I know! But you can use this time to check out more delicious recipes on my site—like my famous Chocolate Chip Cookies! 🍪
- Finish with Flare: When you’re ready to serve these up, top each cheesecake cup with some whipped cream and a sprinkle of semi-sweet chocolate chips. Voila! Dessert is served.
Cooking Tips
- Keep it Cool: If the peanut butter mixture feels too thick, a splash of heavy cream could do the trick. Just mix it in until you reach your desired consistency.
- Flavor Twists: Not a fan of chocolate chips? You could always sprinkle some crushed peanuts or drizzle caramel sauce on top for a fun twist.
A Quick Personal Note
I can’t tell you how many friends have requested this recipe for their parties. Seriously, it’s become a staple at family gatherings after my kids declared it “the best dessert ever.” If only I had a nickel for every time I heard that!
FAQs
Can I substitute the cream cheese?
Absolutely! If you want a lighter option, consider using Greek yogurt or a dairy-free cream cheese substitute.
How do I store leftovers?
Place them in an airtight container in the fridge, and they should stay good for about 3-4 days. If they even last that long—who can resist?
So there you have it! These Peanut Butter Cheesecake Cups are not just delicious; they’re also a fabulous way to treat yourself (and your loved ones) without spending all day in the kitchen. Go on, give them a try, and I guarantee you’ll be the star of your next event. And hopefully, you’ll keep coming back for more delightful recipes like my delightful cookies.
Remember, cooking is all about joy, so don’t stress—just have fun with it! Happy baking! 🎉
Print
Peanut Butter Cheesecake Cups
Description
Hey there, dessert aficionados! If you’re anything like me, your day might be a whirlwind of activities, from managing your job to juggling family commitments and trying to find time for yourself. Well, have I got a treat for you! These Peanut Butter Cheesecake Cups are not only irresistibly yummy, but they’re also super simple to whip up. Whether you’re looking to impress guests at the next get-together or simply want a sweet escape after a long day, these bite-sized delights are the answer. Trust me; your taste buds will thank you!
Ingredients
- 1 cup crushed graham crackers
- 1/4 cup granulated sugar
- 1/4 cup unsalted butter, melted
- 1 cup creamy peanut butter
- 8 oz cream cheese, softened
- 1 cup powdered sugar
- 1 tsp vanilla extract
- 1 cup whipped cream
- 1 cup semi-sweet chocolate chips
- 1/2 cup heavy cream
Instructions
- Preheat and Prepare: First things first, preheat your oven to 350°F (175°C). Line your muffin tin with paper liners; it’s like giving your cheesecake cups a cozy bed to rest on.
- Crust Creation: In a medium bowl, mix together the crushed graham crackers, granulated sugar, and melted butter. Use a fork or your hands (don’t worry, it’s fun!) to combine everything until the mixture resembles damp sand.
- Press and Bake: Now, press this mixture firmly into the bottom of each muffin liner to form your crust. Bake for about 5 minutes, then remove them from the oven and let them cool completely (even superheroes need a break, right?).
- Filling Time: While your crusts are chilling like the cool kids, get a large bowl and beat the softened cream cheese and creamy peanut butter. Once it’s nice and smooth (think velvet), mix in the powdered sugar and vanilla extract until everything is well blended.
- The Grand Assembly: Fold in that glorious whipped cream gently. You want to keep the lightness—we’re going for airy, not dense! Spoon the mixture into your cooled crusts.
- Chill Out: Pop these beauties into the fridge for a bit (at least 2 hours) to firm up. It’s the hardest part, I know! But you can use this time to check out more delicious recipes on my site—like my famous Chocolate Chip Cookies! 🍪
- Finish with Flare: When you’re ready to serve these up, top each cheesecake cup with some whipped cream and a sprinkle of semi-sweet chocolate chips. Voila! Dessert is served.
Notes
- Keep it Cool: If the peanut butter mixture feels too thick, a splash of heavy cream could do the trick. Just mix it in until you reach your desired consistency.
- Flavor Twists: Not a fan of chocolate chips? You could always sprinkle some crushed peanuts or drizzle caramel sauce on top for a fun twist.
